
How to Post Using the Social Planner
This tutorial will teach you how to post manually, set up automated posting, how to easily import a CSV spreadsheet of content for your social media and much more!
Before posting anything, make sure your social media accounts are connected (please see this tutorial for more detailed instructions).
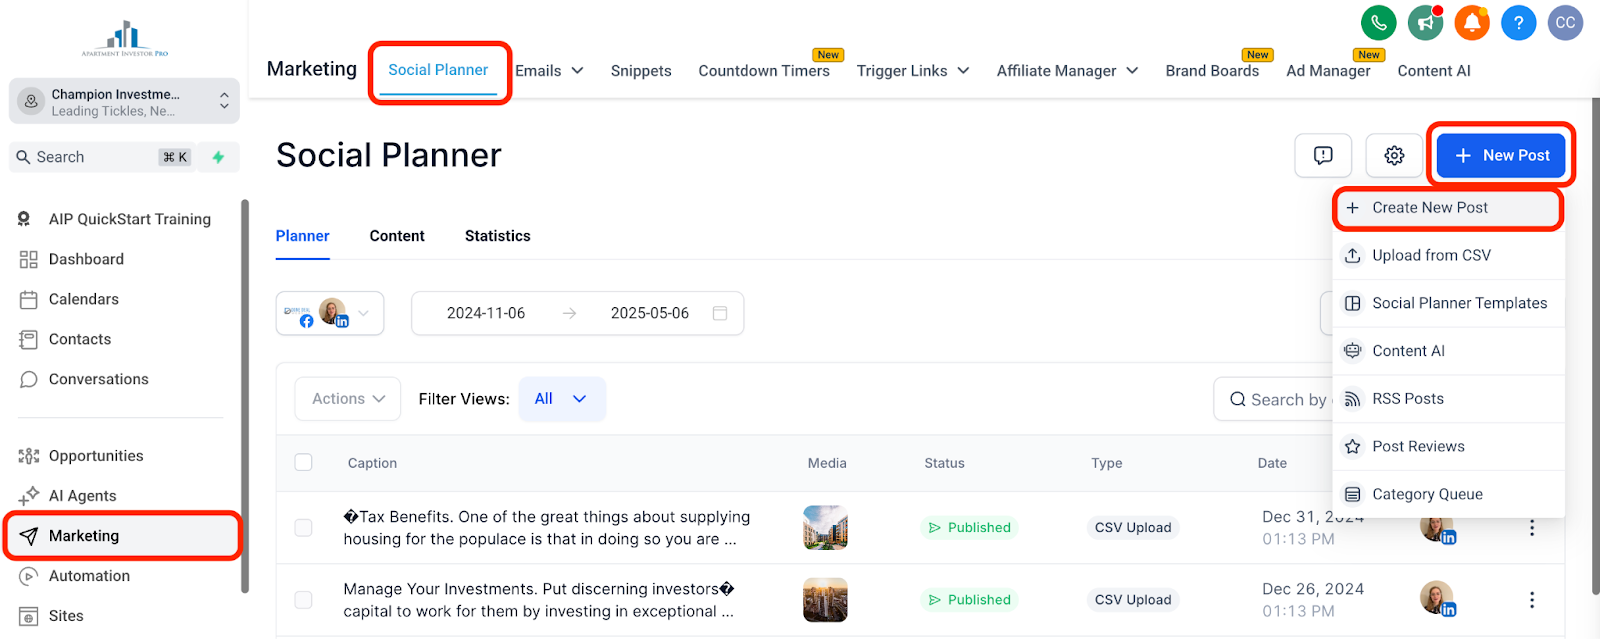
From your dashboard menu, click on Marketing, which should automatically open to the Social Planner Tab
Click on + New Post and select the option that fits your content. For now we’ll show you how to create a basic post from scratch, and further down in this lesson we’ll show you how to create a post using a CSV
Click on + New Post > Create New Post
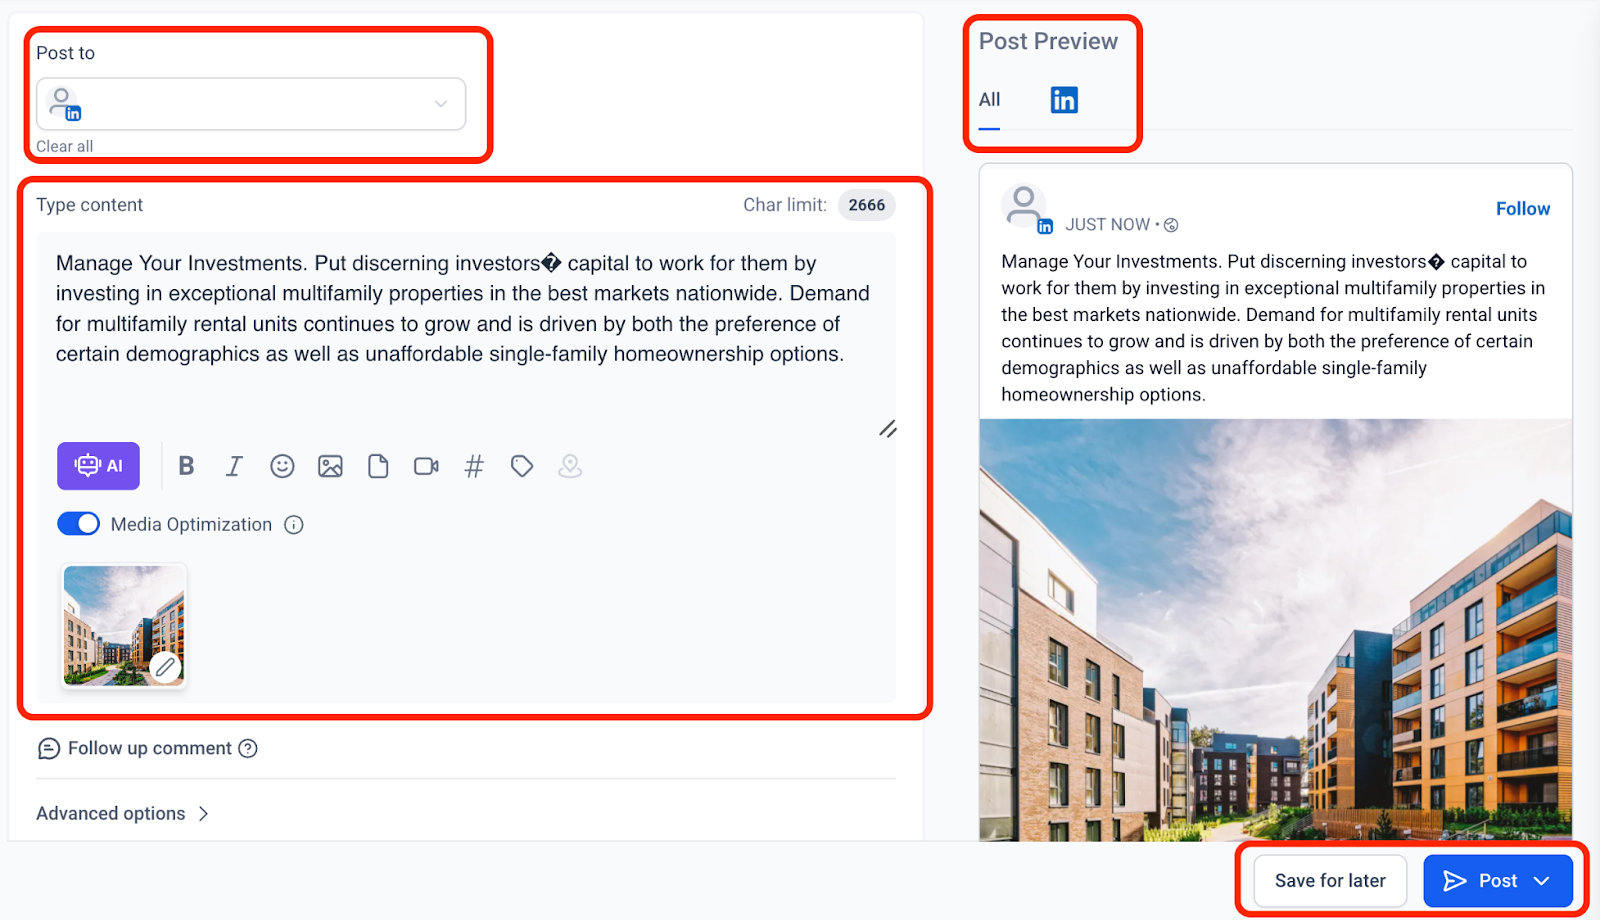
Use the dropdown to select the account(s) you want to post to
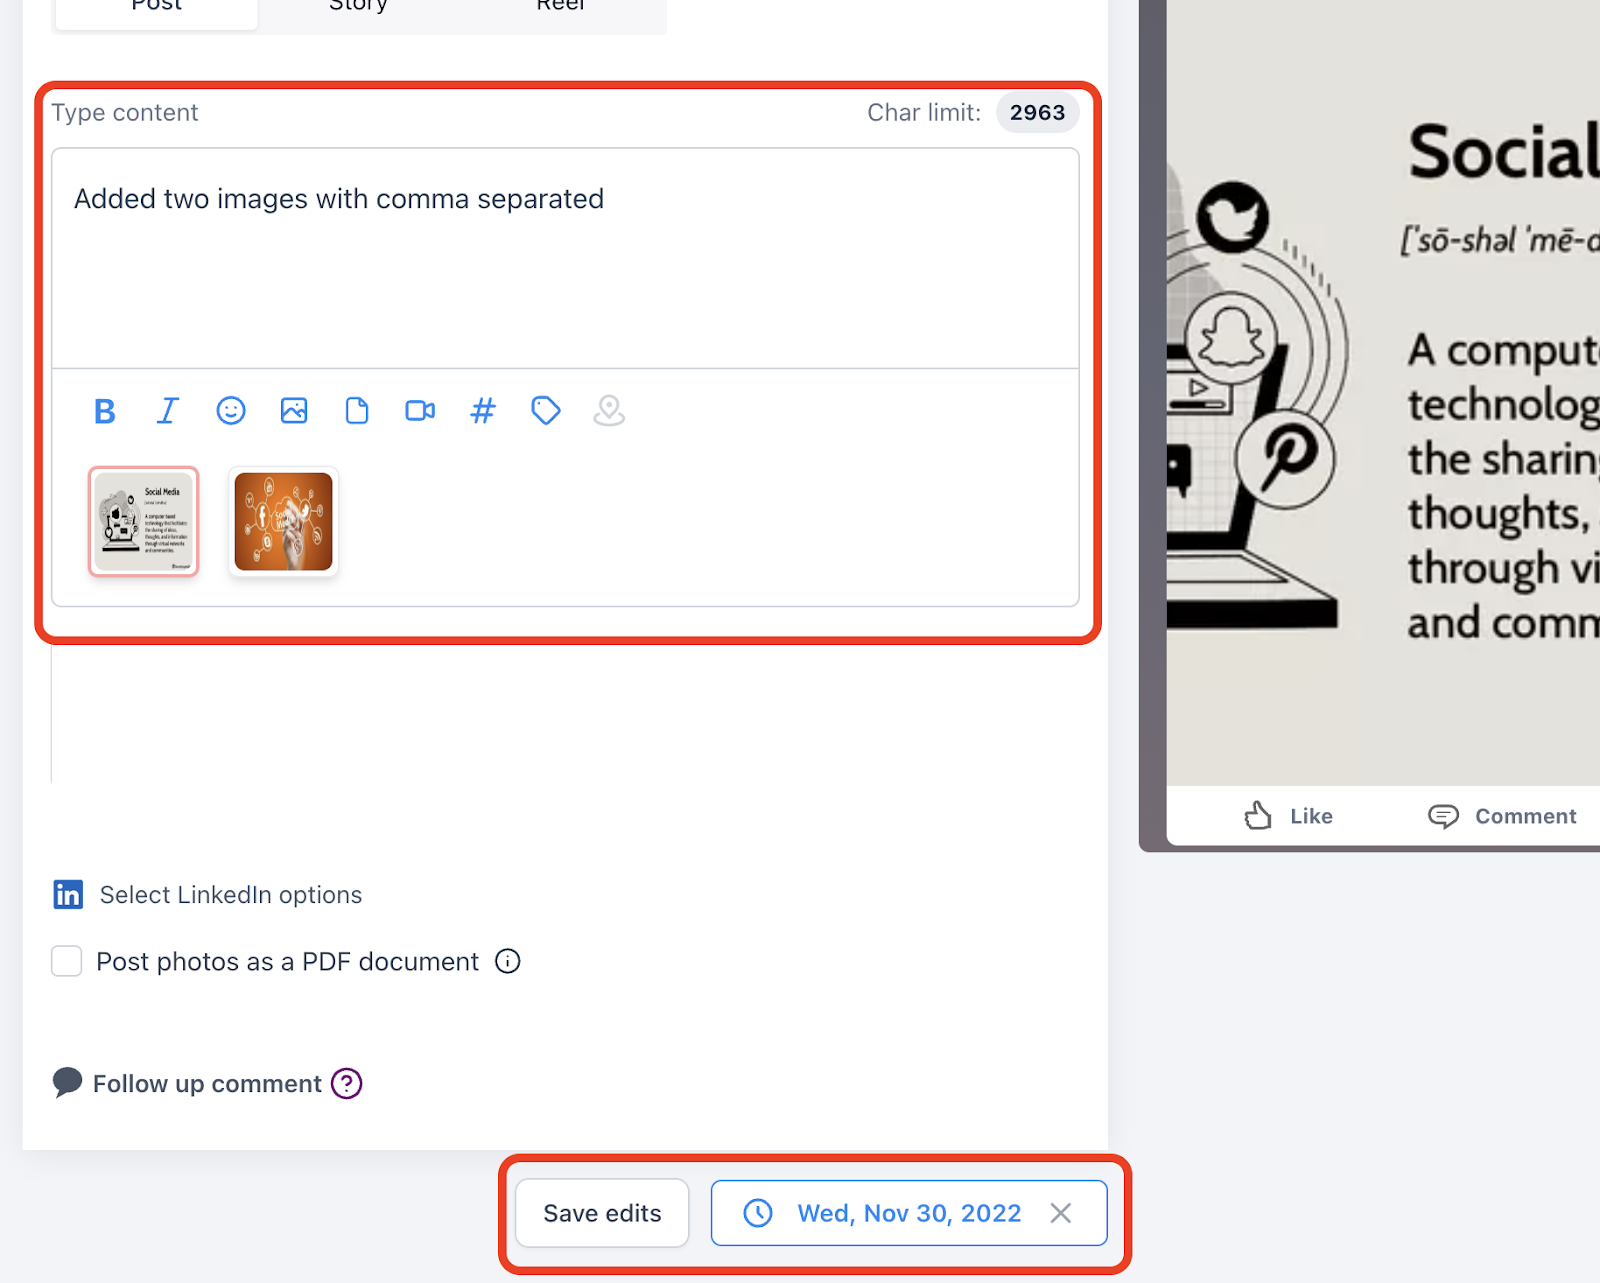
Fill in the post content. You can use the icons below the text field to add images, videos, files, hashtags, etc.
The right side of the screen shows you a preview of what your post will look like (you can toggle between the different platform previews)
In the bottom right corner, you have several options
Save for later: save the post as a draft to continue working on later
Post Now: upload the post immediately
Schedule Post: schedule the post to be uploaded at a later time or date
Send Post for Approval: schedule the post for a later date and send the post content to any user on your account to be approved
Schedule Recurring Posts: schedule a recurring post for a specified time frame
Once you save, post, or schedule your post, it will show up in the list of posts on your Social Planner page
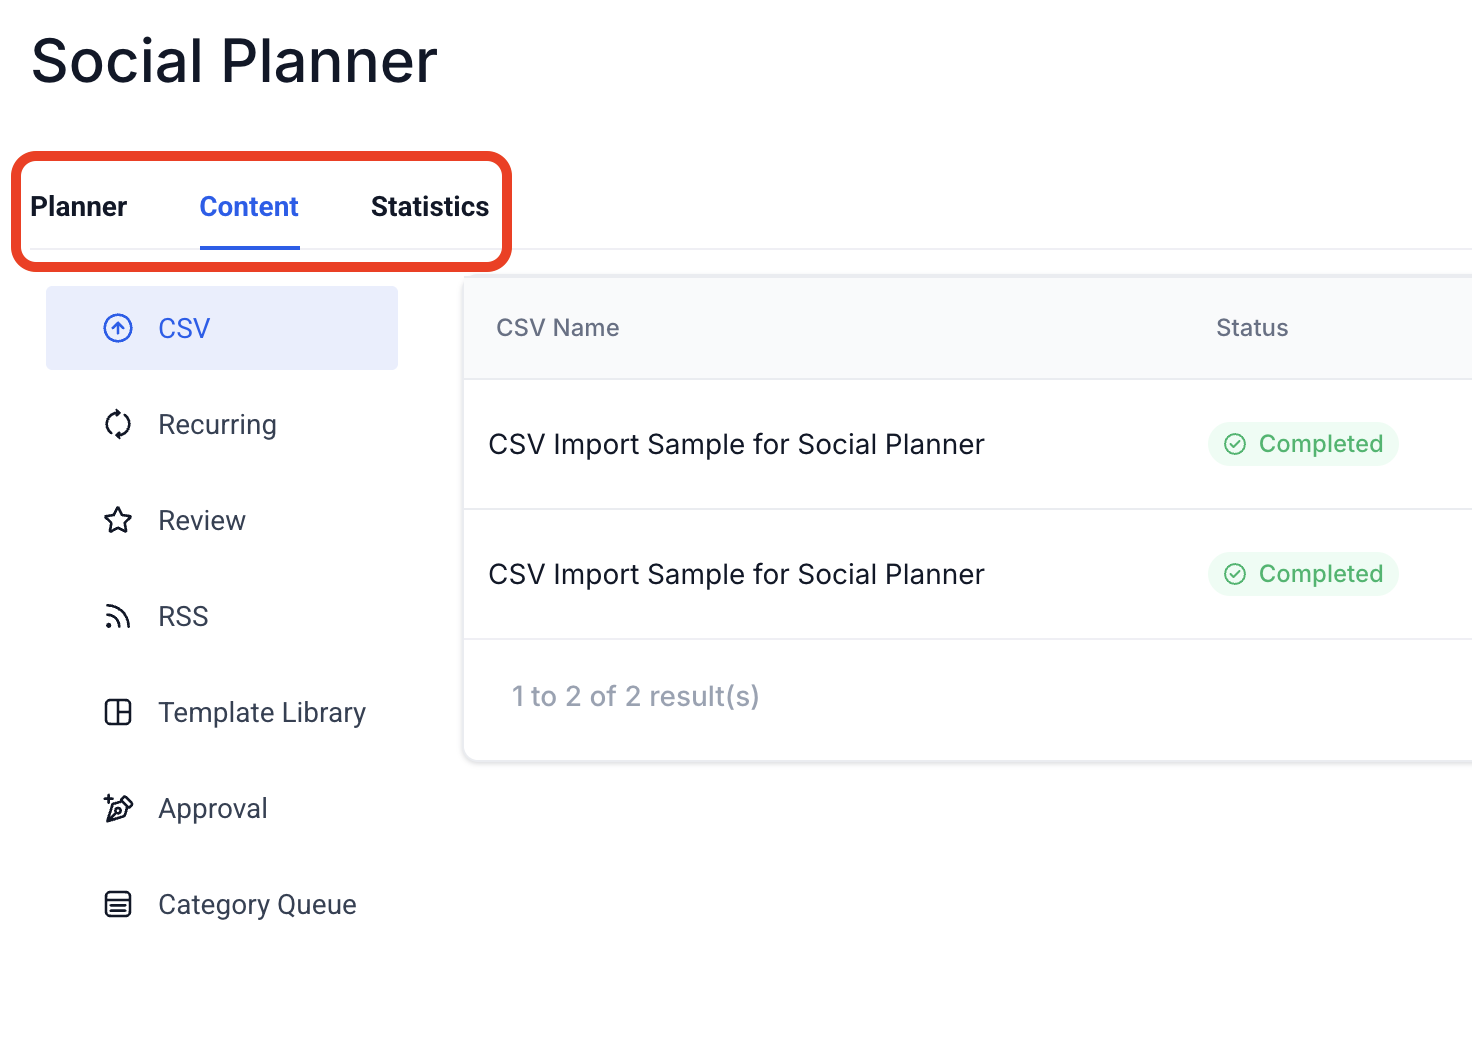
You can use the tabs on the Planner page to see all your posts (Planner), sort them by content type and posts waiting for approval (Content), and see post statistics for each social media platform
To create a post using a CSV:
On the Social Planner page, click on + New Post > Upload from CSV
Upload your file, or download the sample file to use as a template
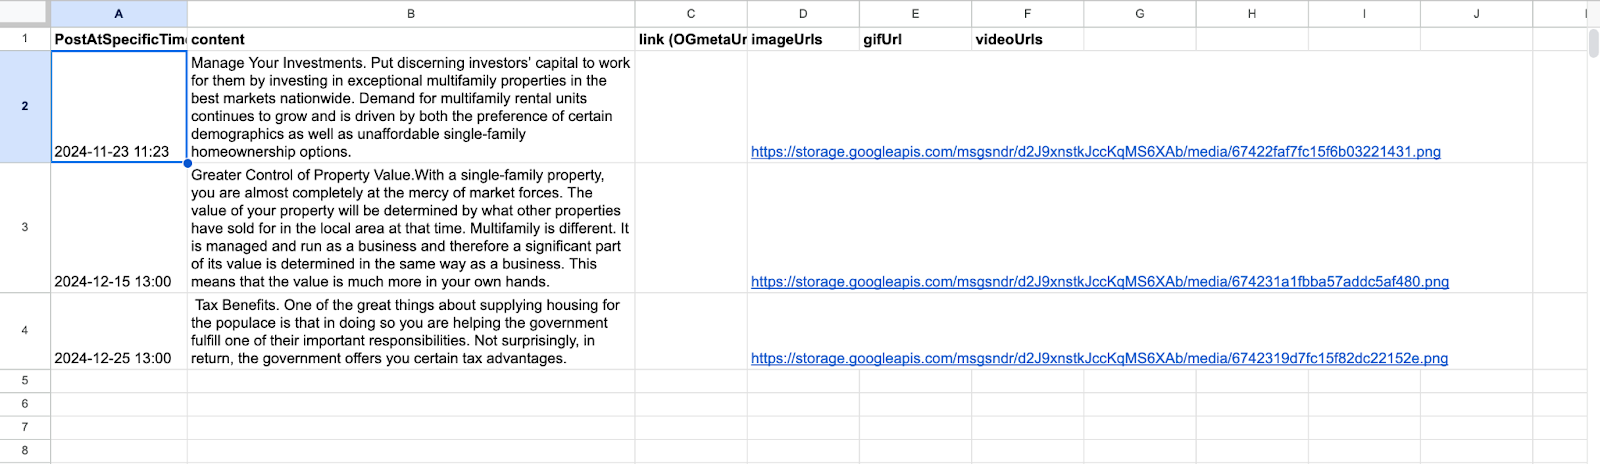
Your CSV file needs to be formatted very specifically:
First column: what time do you want that line of content posted. It should be entered as follows: YYYY-MM-DD HH:mm:ss (year-month-day hour-minutes-seconds)
Second column: content for the post.
Third column: link (OGmetaURL). For example if you’re posting an article in LinkedIn that doesn’t include an image, but you want an image as a preview, that image link can go here.
Fourth Column: image URL(s)
Fifth Column: gif URL(s)
Sixth column: video URL(s)
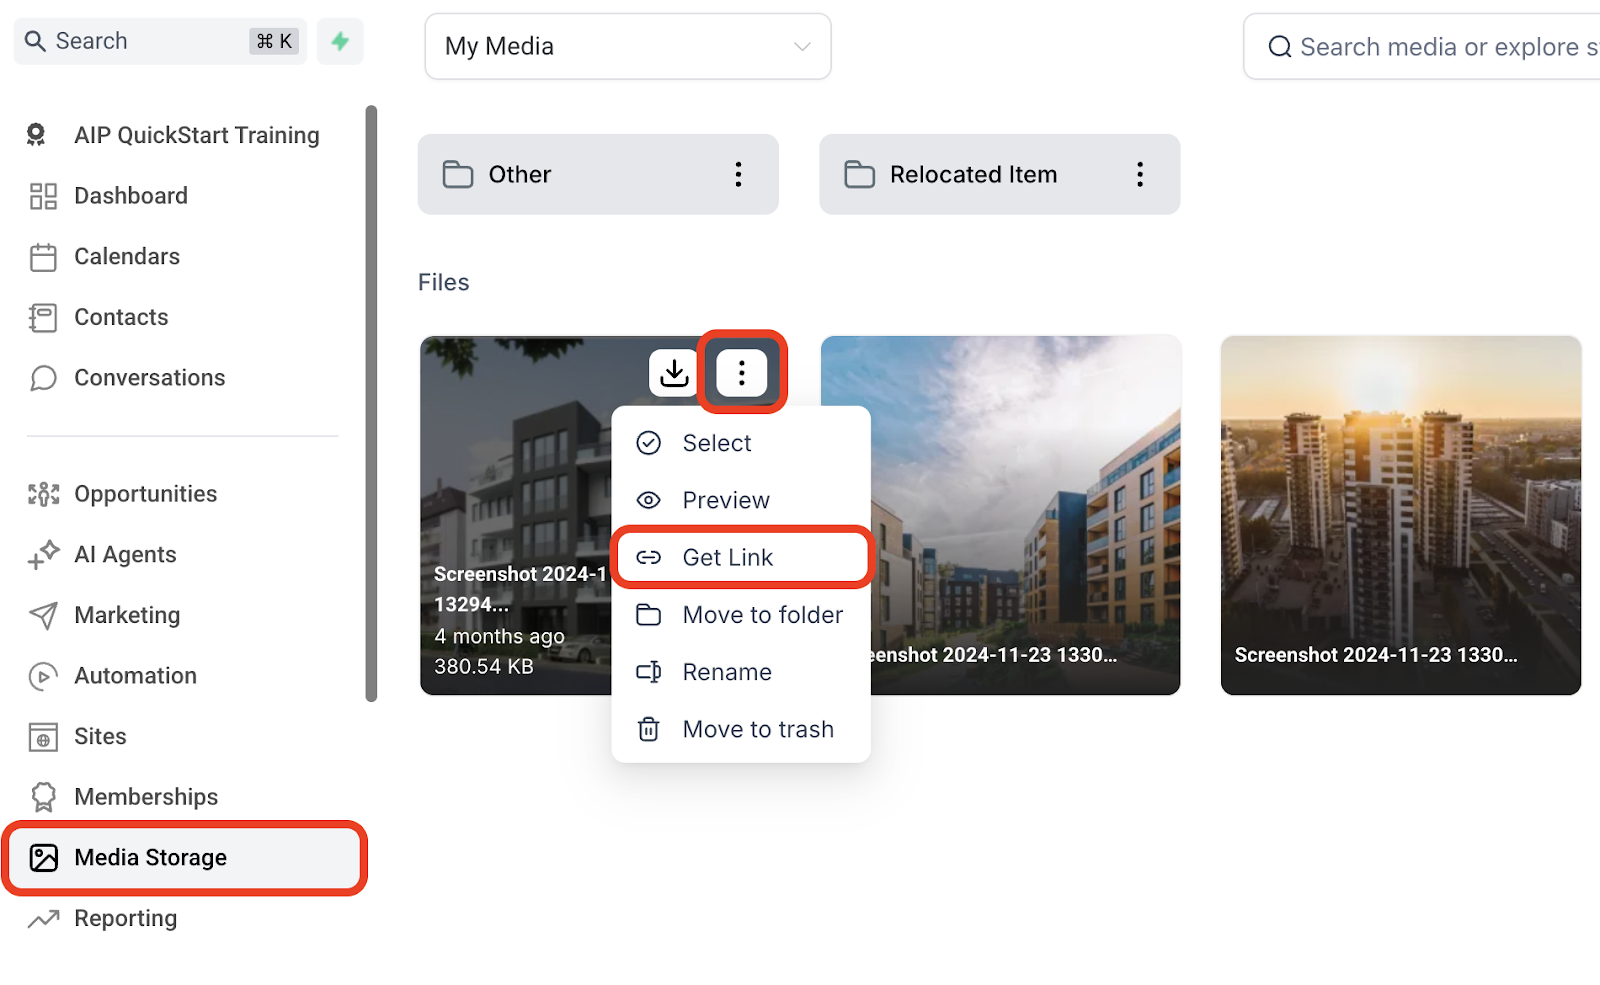
**Note** To find a URL for your media: go to your dashboard menu > Media Storage. Hover over the picture/video/gif you want to use and click on the 3 dots in the top right corner. Then click Get Link. The link will automatically be copied for you to paste into your document.
Once you have selected the CSV file you’d like to use, click Next. Then select the account(s) you want to post to, and click Create
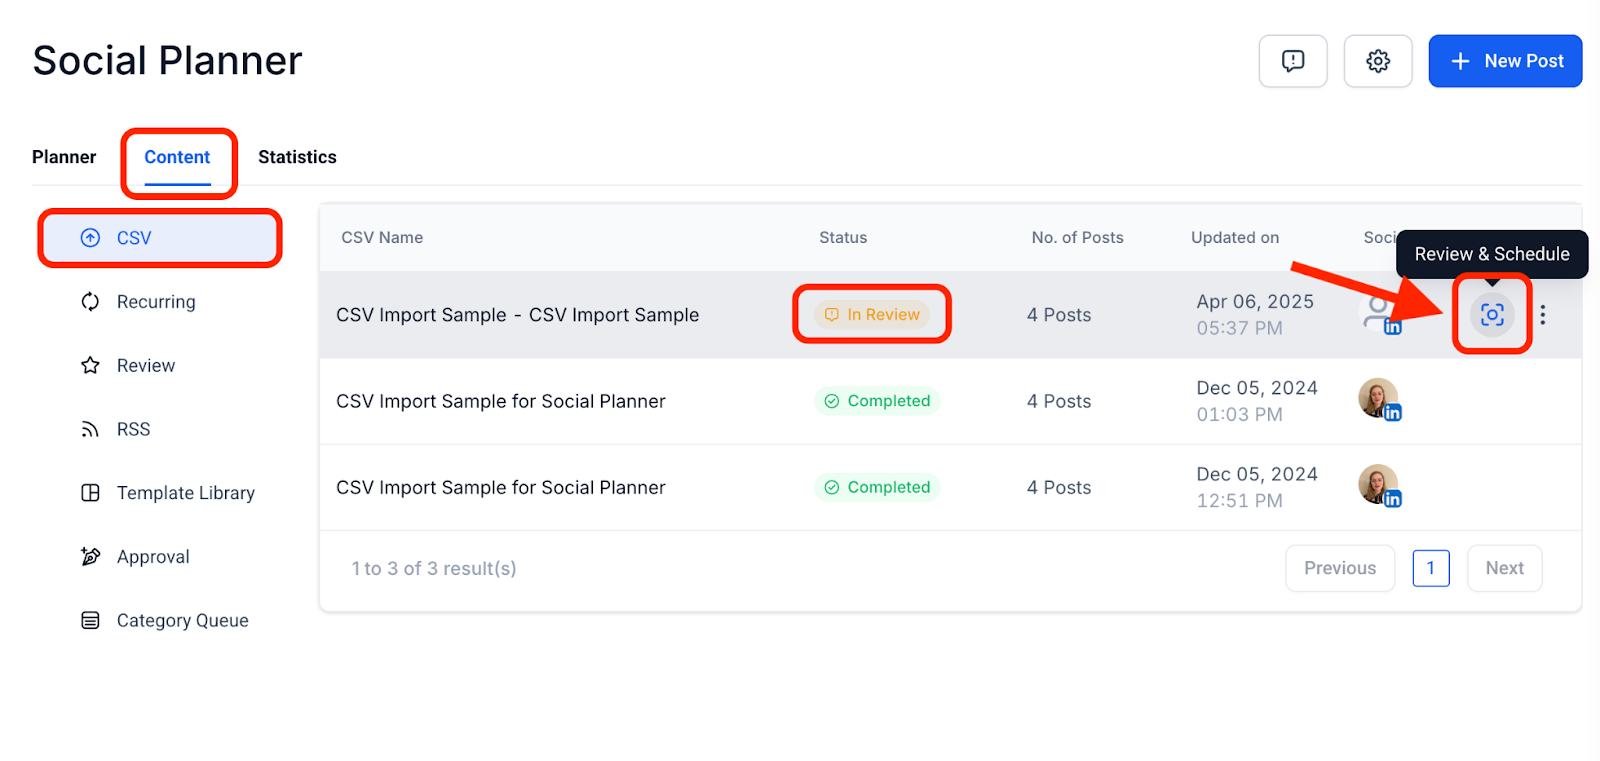
The page should automatically open up to the content tab and show you your newly uploaded CSV posting. Next to it, click on the little square icon that says “Review and Schedule” when hovering over it
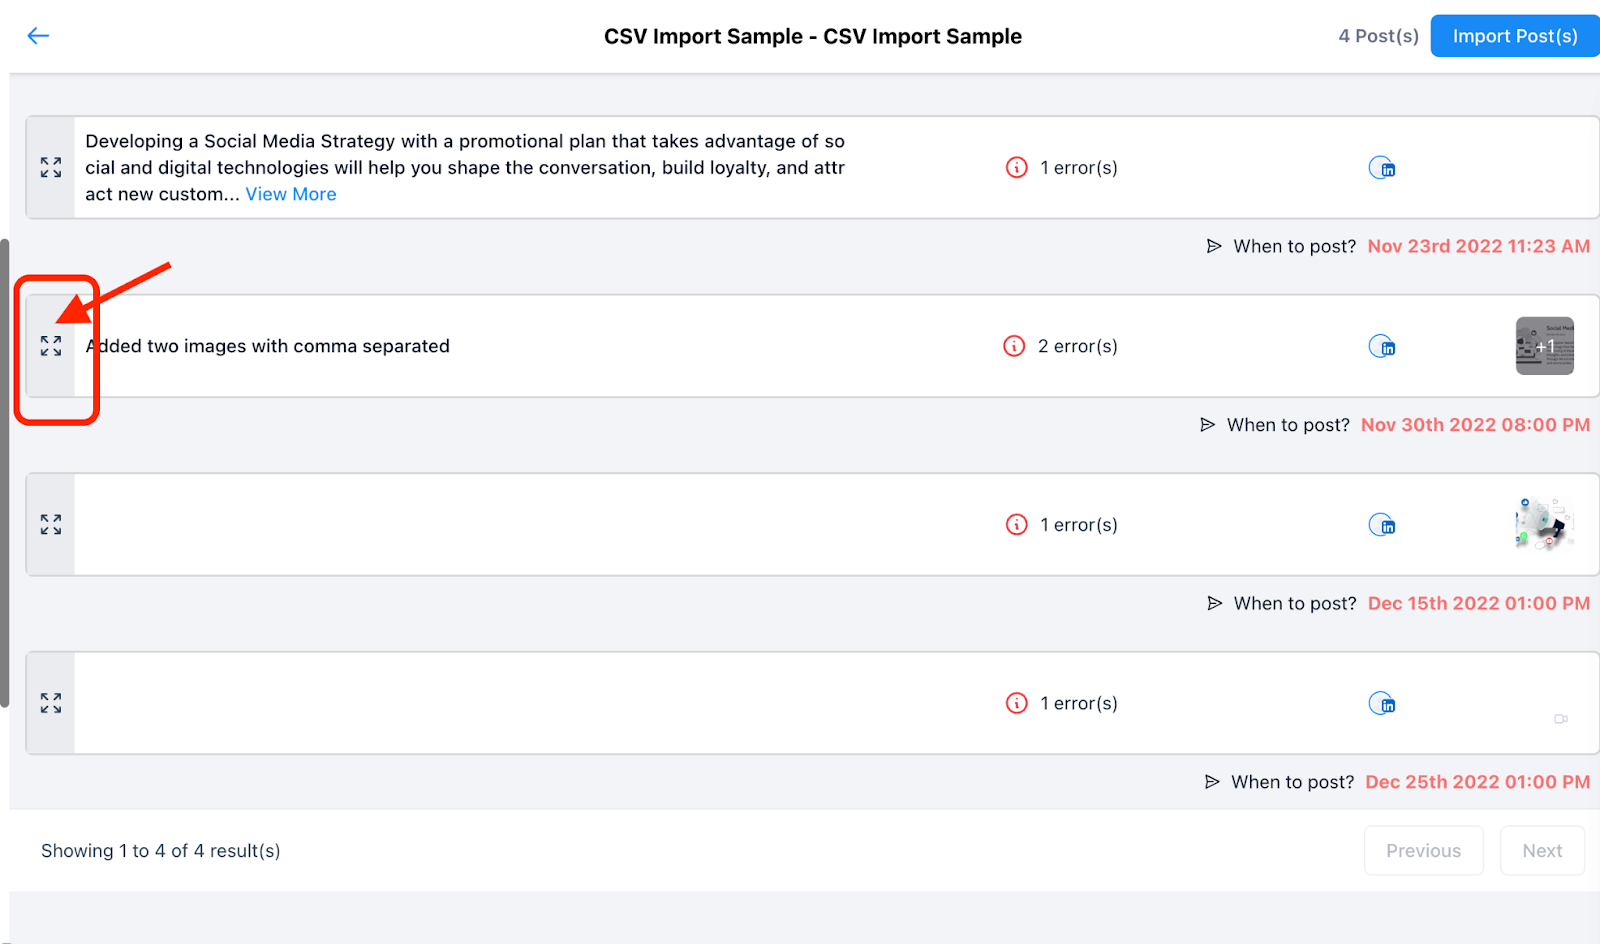
Use this page to review, edit, and post or schedule each post included in the CSV. Simply click on the button with the four arrows next to each post to expand it and open the editing page (if you included the scheduled posting date in your CSV, that will show up on the editing page, but you can simply click on it to change it)
Once everything is ready, click on Import Post(s) in the top right corner
You will then see each individual post listed on the Social Planner page
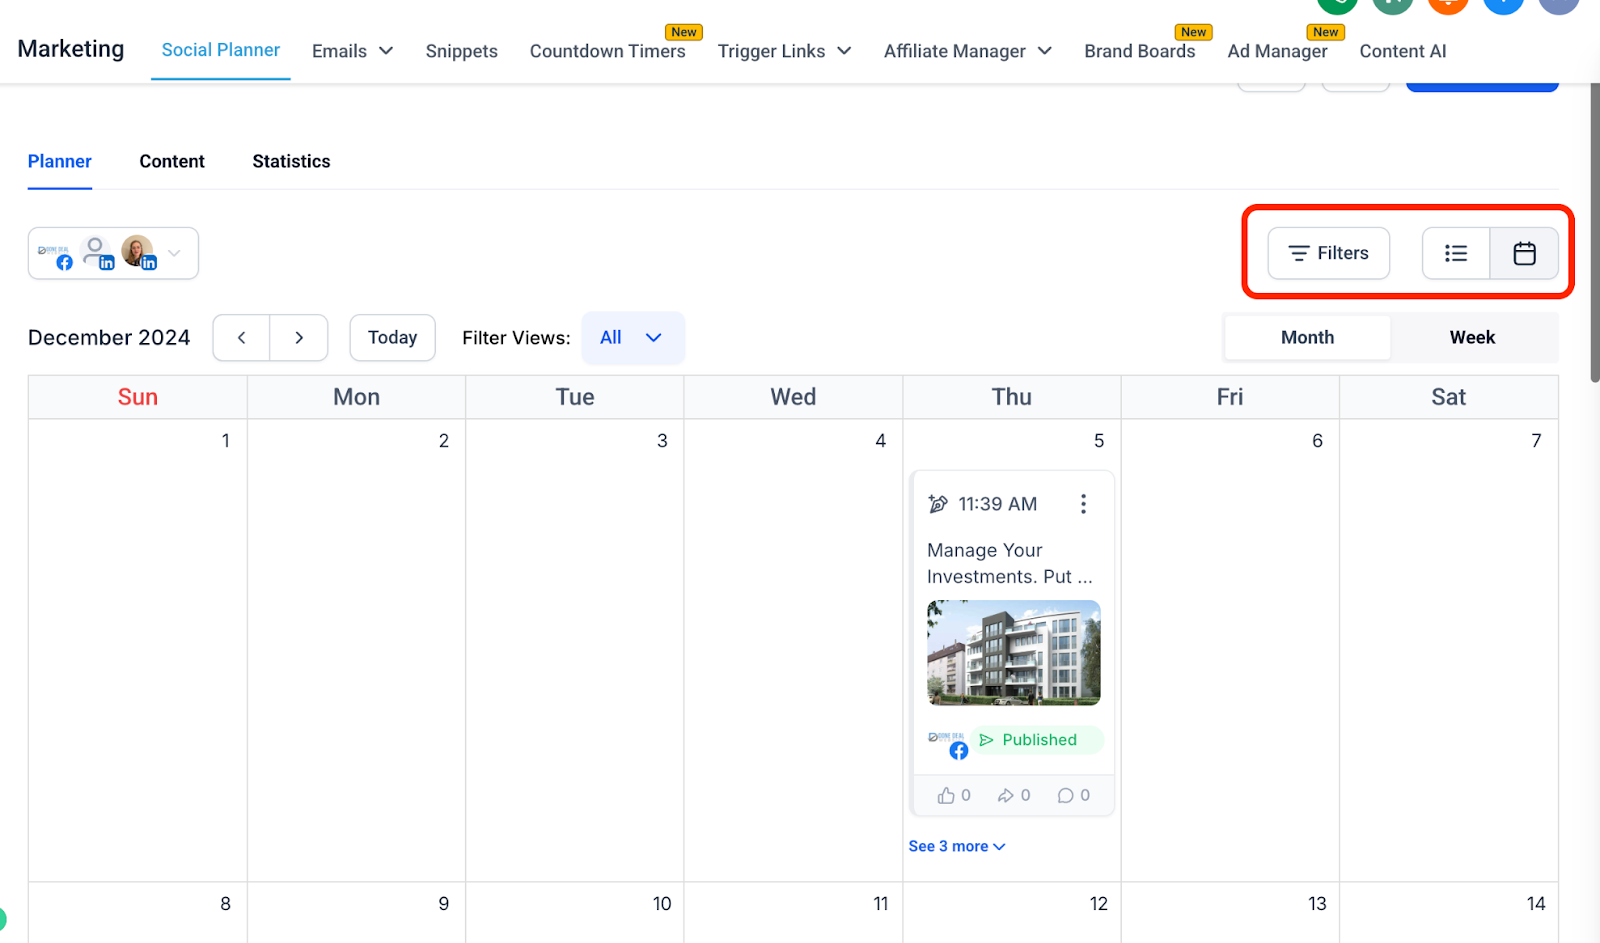
You can use the icons in the top right of the Social planner page to switch between list and calendar view or filter posts to find specific ones

Have a question?
Send us an email at [email protected]
or click here to see more options to contact us