
How to Set Up Your Phone Number for Calling & Texting (Phone Setup Guide)
**Important information before you get started**
Due to the prevalence of text message scams, phone providers now have strict requirements for phone numbers used to send SMS text messages, so before you purchase a phone number, please make sure you have all these requirements filled and ready to go:
Your legal business name must match on your AIP account business profile and the phone number verification submission
Authorized business rep must match on your AIP account business profile and the phone number verification submission
An active domain connected to your site
A privacy policy and Terms of Service linked in the footer of your website, funnel(s), and forms
Your email address listed on your website must match your domain (for example, you can’t use a gmail address, it must be [email protected])
When filling out the phone number verification form, please use the following examples to fill in their corresponding fields:
In the Use Case Description field:
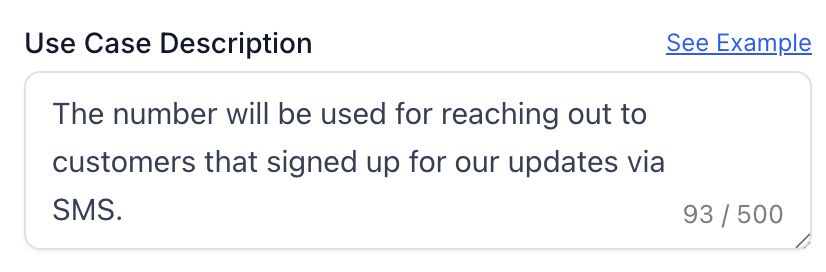
Be as specific as possible when describing the purpose of your text messages. Please see the ideas and example below:
Confirmation messages sent when lead books call, fills out a form
Reminder messages sent
Day of appointment messages sent about
Follow-up messages sent
Account information
Example for you to copy and paste (and edit as it applies to your business):
“This campaign sends appointment confirmations and updates to customers who have scheduled a call or signed up to receive more information regarding investment information and opportunities. Messages include but are not limited to estimates, appointment reminders, and follow-ups."
Include a description of your opt-in process (please see below for an example you can copy and paste)
“Our opt-in process is as follows:
1. Customers explicitly opt-in by checking a dedicated consent checkbox on our website that states, “I Consent to Receive SMS Notifications and Alerts from [fill in your company name]. Message Frequency varies. Msg & data rates may apply. Text HELP to [fill in your company name] for help. Reply STOP to unsubscribe.”
2. We offer a separate checkbox for marketing messages that states, “By checking this box, I agree to receive occasional marketing messages from [fill in your company name].”
3. Our form prominently displays links to Privacy Policy and Terms of Service at the bottom
4. We maintain timestamped records of all opt-ins along with the specific language presented at time of consent
5. All customer communication clearly explain that customers can opt-out at any time by replying STOP”
If using a DBA (doing business as), mention it in your use case and add it into your footer (e.g. “[Company Name], a registered business in [location], DBA [DBA Name]"or "Copyright [DBA]. All Rights Reserved.”)
In the Message Content field:
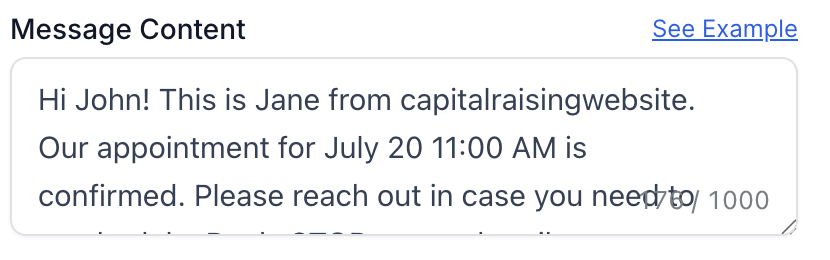
Include multiple sample messages you may be sending out. Please see the examples below that you can copy and paste (and edit as they apply to your business):
“Hi [first name], this is [fill in your name] from [fill in your company name]. Your investor call is scheduled for [date and time]. Call [XXX-XXX-XXXX] to reschedule. Reply STOP to unsubscribe.”
“Hey [first name], just a friendly reminder that your appointment is in 1 hour. We look forward to seeing you! - [fill in your company name]
[meeting location URL] Reply STOP to unsubscribe.”“Hi [first name]! Sorry you weren't able to make our call - let's get you rescheduled! You can book another day/time that will work for you by clicking here: [URL] We look forward to speaking with you! - [fill in your company name] Reply STOP to unsubscribe.”
In the Opt-In Workflow Image URLs field:

From your dashboard, click on Media Storage (you may find it useful to open your dashboard in a new tab to keep your phone verification form open at the same time)
Find the image labeled “Opt-In Workflow Image URL,” hover over it, and click on the 3 dots in the corner
Click on Get Link; this will automatically copy the link, allowing you to paste it into the Opt-In Workflow Image URLs field in the phone verification form

Instructions:
Log into your dashboard. In the bottom left-hand corner, click on Settings.
In the settings menu on the left-hand side, click on Phone Numbers.
Click on the blue + Add Number button in the top right corner. In the dropdown menu that appears, select Add Phone Number.
Now you can choose the number you want to use. You can set your country to change the numbers available to choose from, or use the Filter button to see more options. Use the following filters to find a number that you like:
Search by digit or phrases. Use this to search for numbers with specific numeric orders (e.g. your local area code) or numbers that correspond to letters to spell something (e.g. 468378 to spell INVEST).
Match to. Use this to specify which part of the number you want your search to line up with (e.g. for an area code, select match to First part of number).
Capabilities. It’s recommended to keep all of these options selected (SMS, MMS and Voice).
Number Type. Choose a local number and/or a toll-free number.
**Note** You’ll see that there’s a small charge to set up the phone number, and it’s a little higher for a toll-free number. If you have any credits included in your plan, the cost is deducted from those; if you are on the Starter plan, it will simply be billed to your account.
Once you have selected the number you want to use, click the blue Proceed to Buy button in the lower right corner.
The next pop-up will ask you to verify your identity. Click the button that says Begin verifying.
You'll need to take a picture of some form of Government issued photo ID. Let's say you're purchasing the phone number on your computer; you can use the camera on your computer OR you can select the option to use a different device.
If you continue on a different device, you have 2 options:
Open the camera on your smart phone, point it at the QR code, and click the link that comes up

Select the option to send a link to your email.
Continue following the instructions to take a photo of your ID. Then you'll need to use the same camera to take a brief video of yourself to verify you match the ID. When everything is verified, hit Done to purchase your number. Once you have the purchase confirmation, it’s a good idea to copy the number down somewhere.
Click the blue Verify this Number button in the lower right corner. (If you see a blue button that says Register for A2P, skip to step 9 at the bottom of this tutorial.) Fill out the next two forms that come up with your business information. (This is a necessary step the system takes to prevent spam numbers from being created.)
The third form that comes up is the Messaging use case form. Here the system just wants to know how you’re planning to use the number and how much. Let’s go through the fields on this form one by one:
Estimated Monthly Volume. How many text messages do you estimate or expect to send in a month?
Opt-in Type. How will most people be opting in to receive text messages from you? If it’s through your website, select Web Form.
Use Case Categories. What is the purpose of your communication with this phone number? Customer Care and/or Marketing are most likely to apply, but you can browse the options and choose the one(s) that best fit your business.
Opt-in Workflow Image URLs. What they want here is proof that you’re actually going to use this phone number to text people (i.e. not spam). Please see the instructions in the introduction section above.
Use Case Description. Give a general description of how you plan to use the number. You can click on See example next to this field on the form to get ideas. You can even copy and paste the example into the box and just change the wording to fit your business.
Message Content. Share an example of what you will be sending to people. Again, you can click to see a couple of examples. You can even copy and paste one of the examples and just edit it to fit you and your business.
Click the blue Send Information for Verification button, and you’re done!
Now your number should show up with “Verification in Progress” underneath. That is for text messages, so you should be able to make phone calls from your new number.
If after buying your phone number you see a blue button that says Register for A2P, click on it. (This is a verification process legally required to prevent spam numbers from being created.)
Scroll to the bottom and click the blue Start Registering Now button.
Fill out your business information in the following steps that appear on the screen.
Where it asks for a tax ID. This is not strictly necessary to use the phone number for sms, but if you’re going to set it up with a business entity (like an LLC), it’s a good idea to get your tax ID and enter it here. It helps with brand recognition and trust for your company.
Campaign Details / Messaging Use Case. This section asks for some basic info on how you plan to use your phone number. For further instructions on how to fill out this section, see step 7 of this tutorial.
Congratulations, your phone number is now set up🎉 To learn how to use your new number to make calls and send text messages, check out this tutorial.

Have a question?
Send us an email at [email protected]
or click here to see more options to contact us