How to Set Up Your Chat Widget
In this lesson, you will learn how to get your prospective investors more engaged by using a live chat widget! Visitors can send messages or connect with you instantly by engaging in live chat or they can leave a message for you to respond later via SMS or email.
How to Configure Your Chat Feature
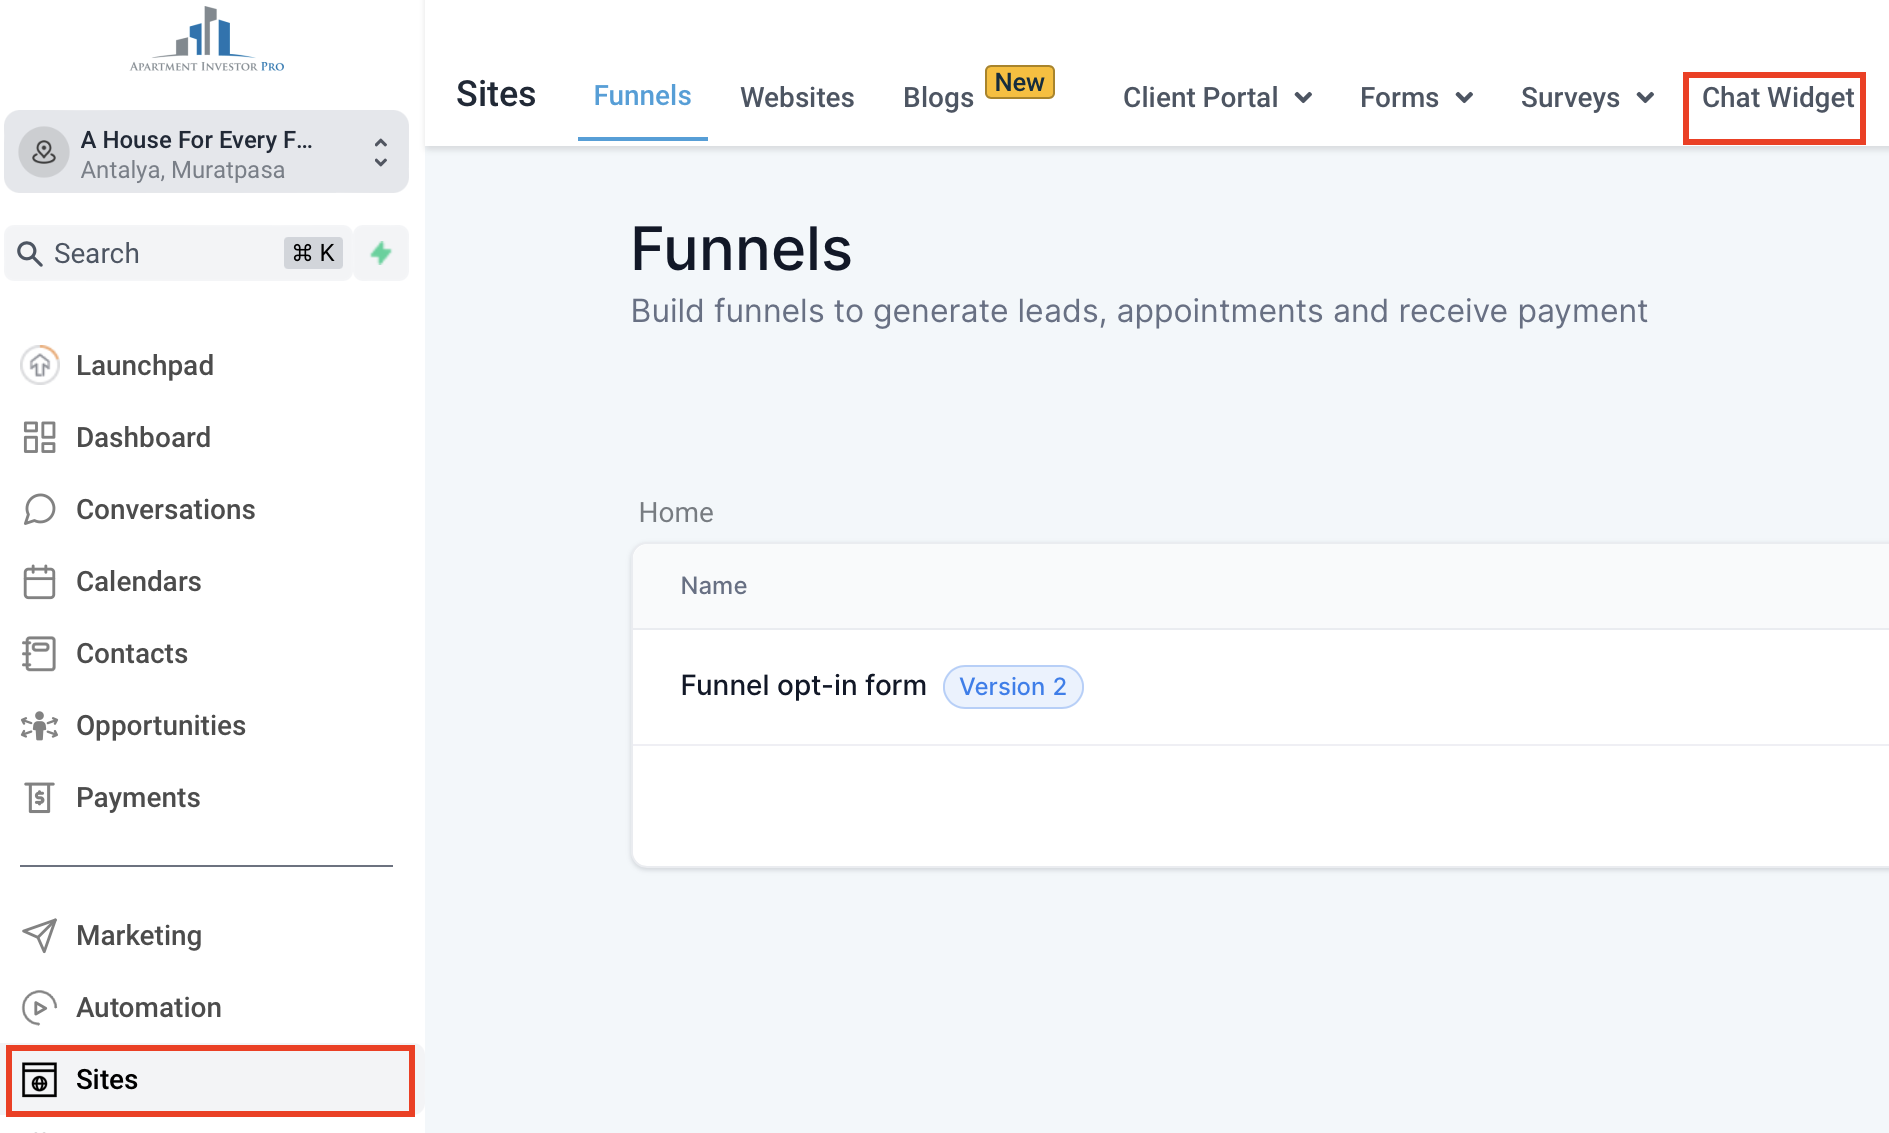
Go to the dashboard, click 'Sites,' and choose 'Chat Widget.'
There you can customize settings like “Chat Bubble”, “Chat Type”, “Widget Window”, and “Acknowledgment settings.”
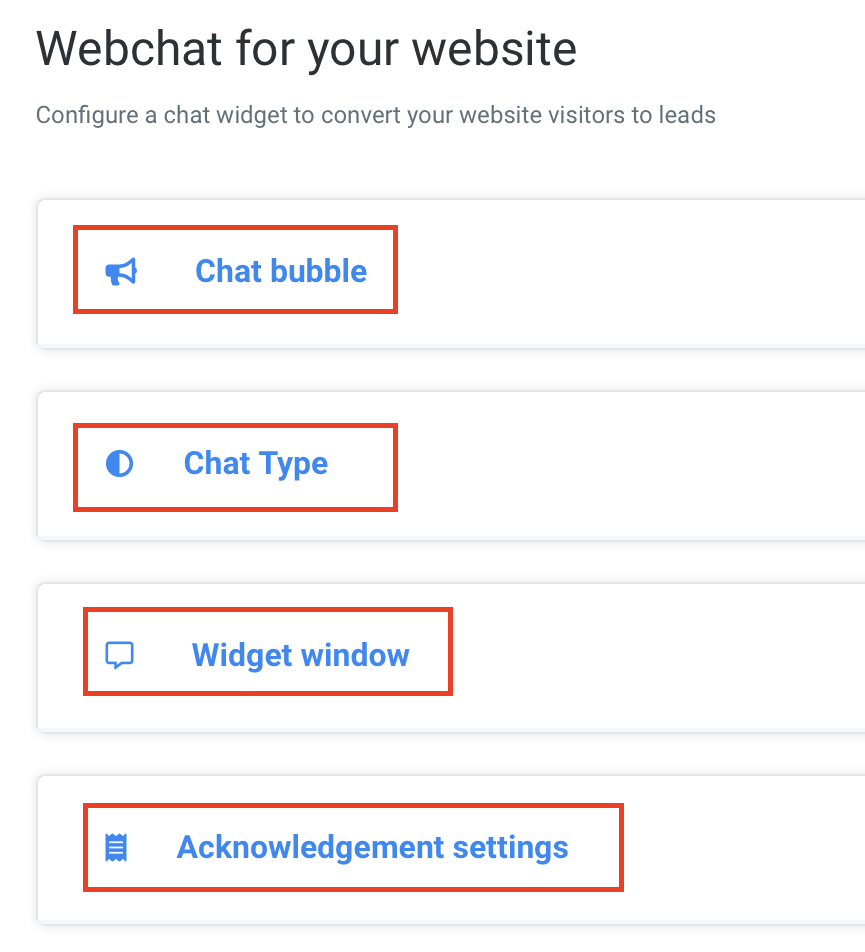
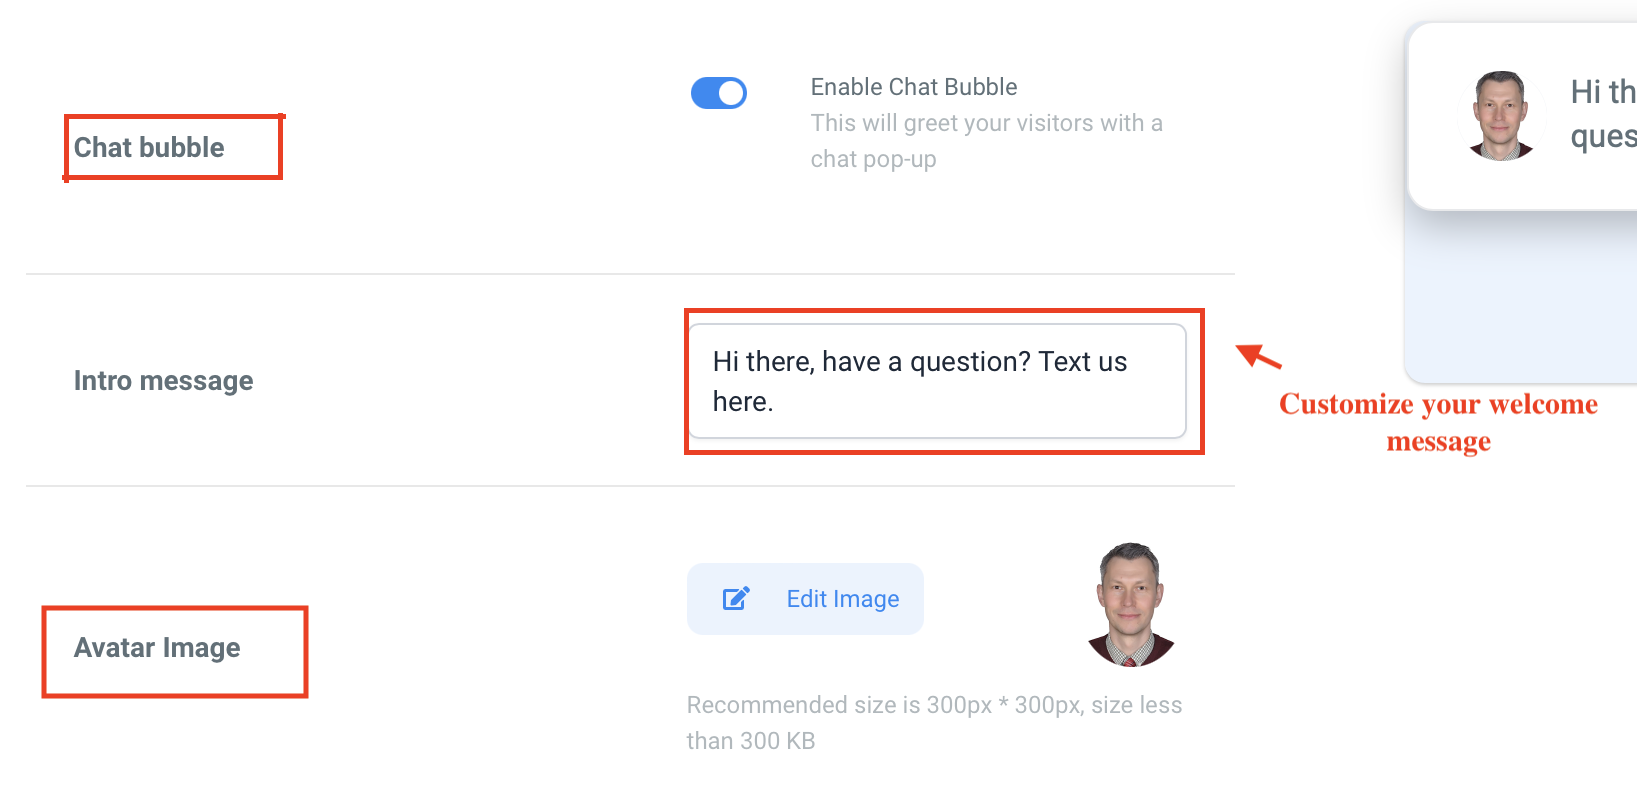
1. In “Chat Bubble” customize the appearance and the welcome message.
2. Choose how you want to communicate by selecting either SMS, Email, or Live chat in the "Chat Type" section.
IMPORTANT: To activate the SMS feature, you'll need to acquire a valid phone number through this platform. For the email option, make sure a valid email address is registered in your profile settings.
To work in live chat you have to be present in the “Conversation” screen when someone sends a message. There's no option available to customize your online time. As you can see from the description it's good for large teams that have 24x7 coverage.
In the Widget Window, personalize the introduction message and enable “Add Email Field” to collect visitor’s emails if you want to reply to them via email. Also, you can customize colors and styles for the widget window and send button.
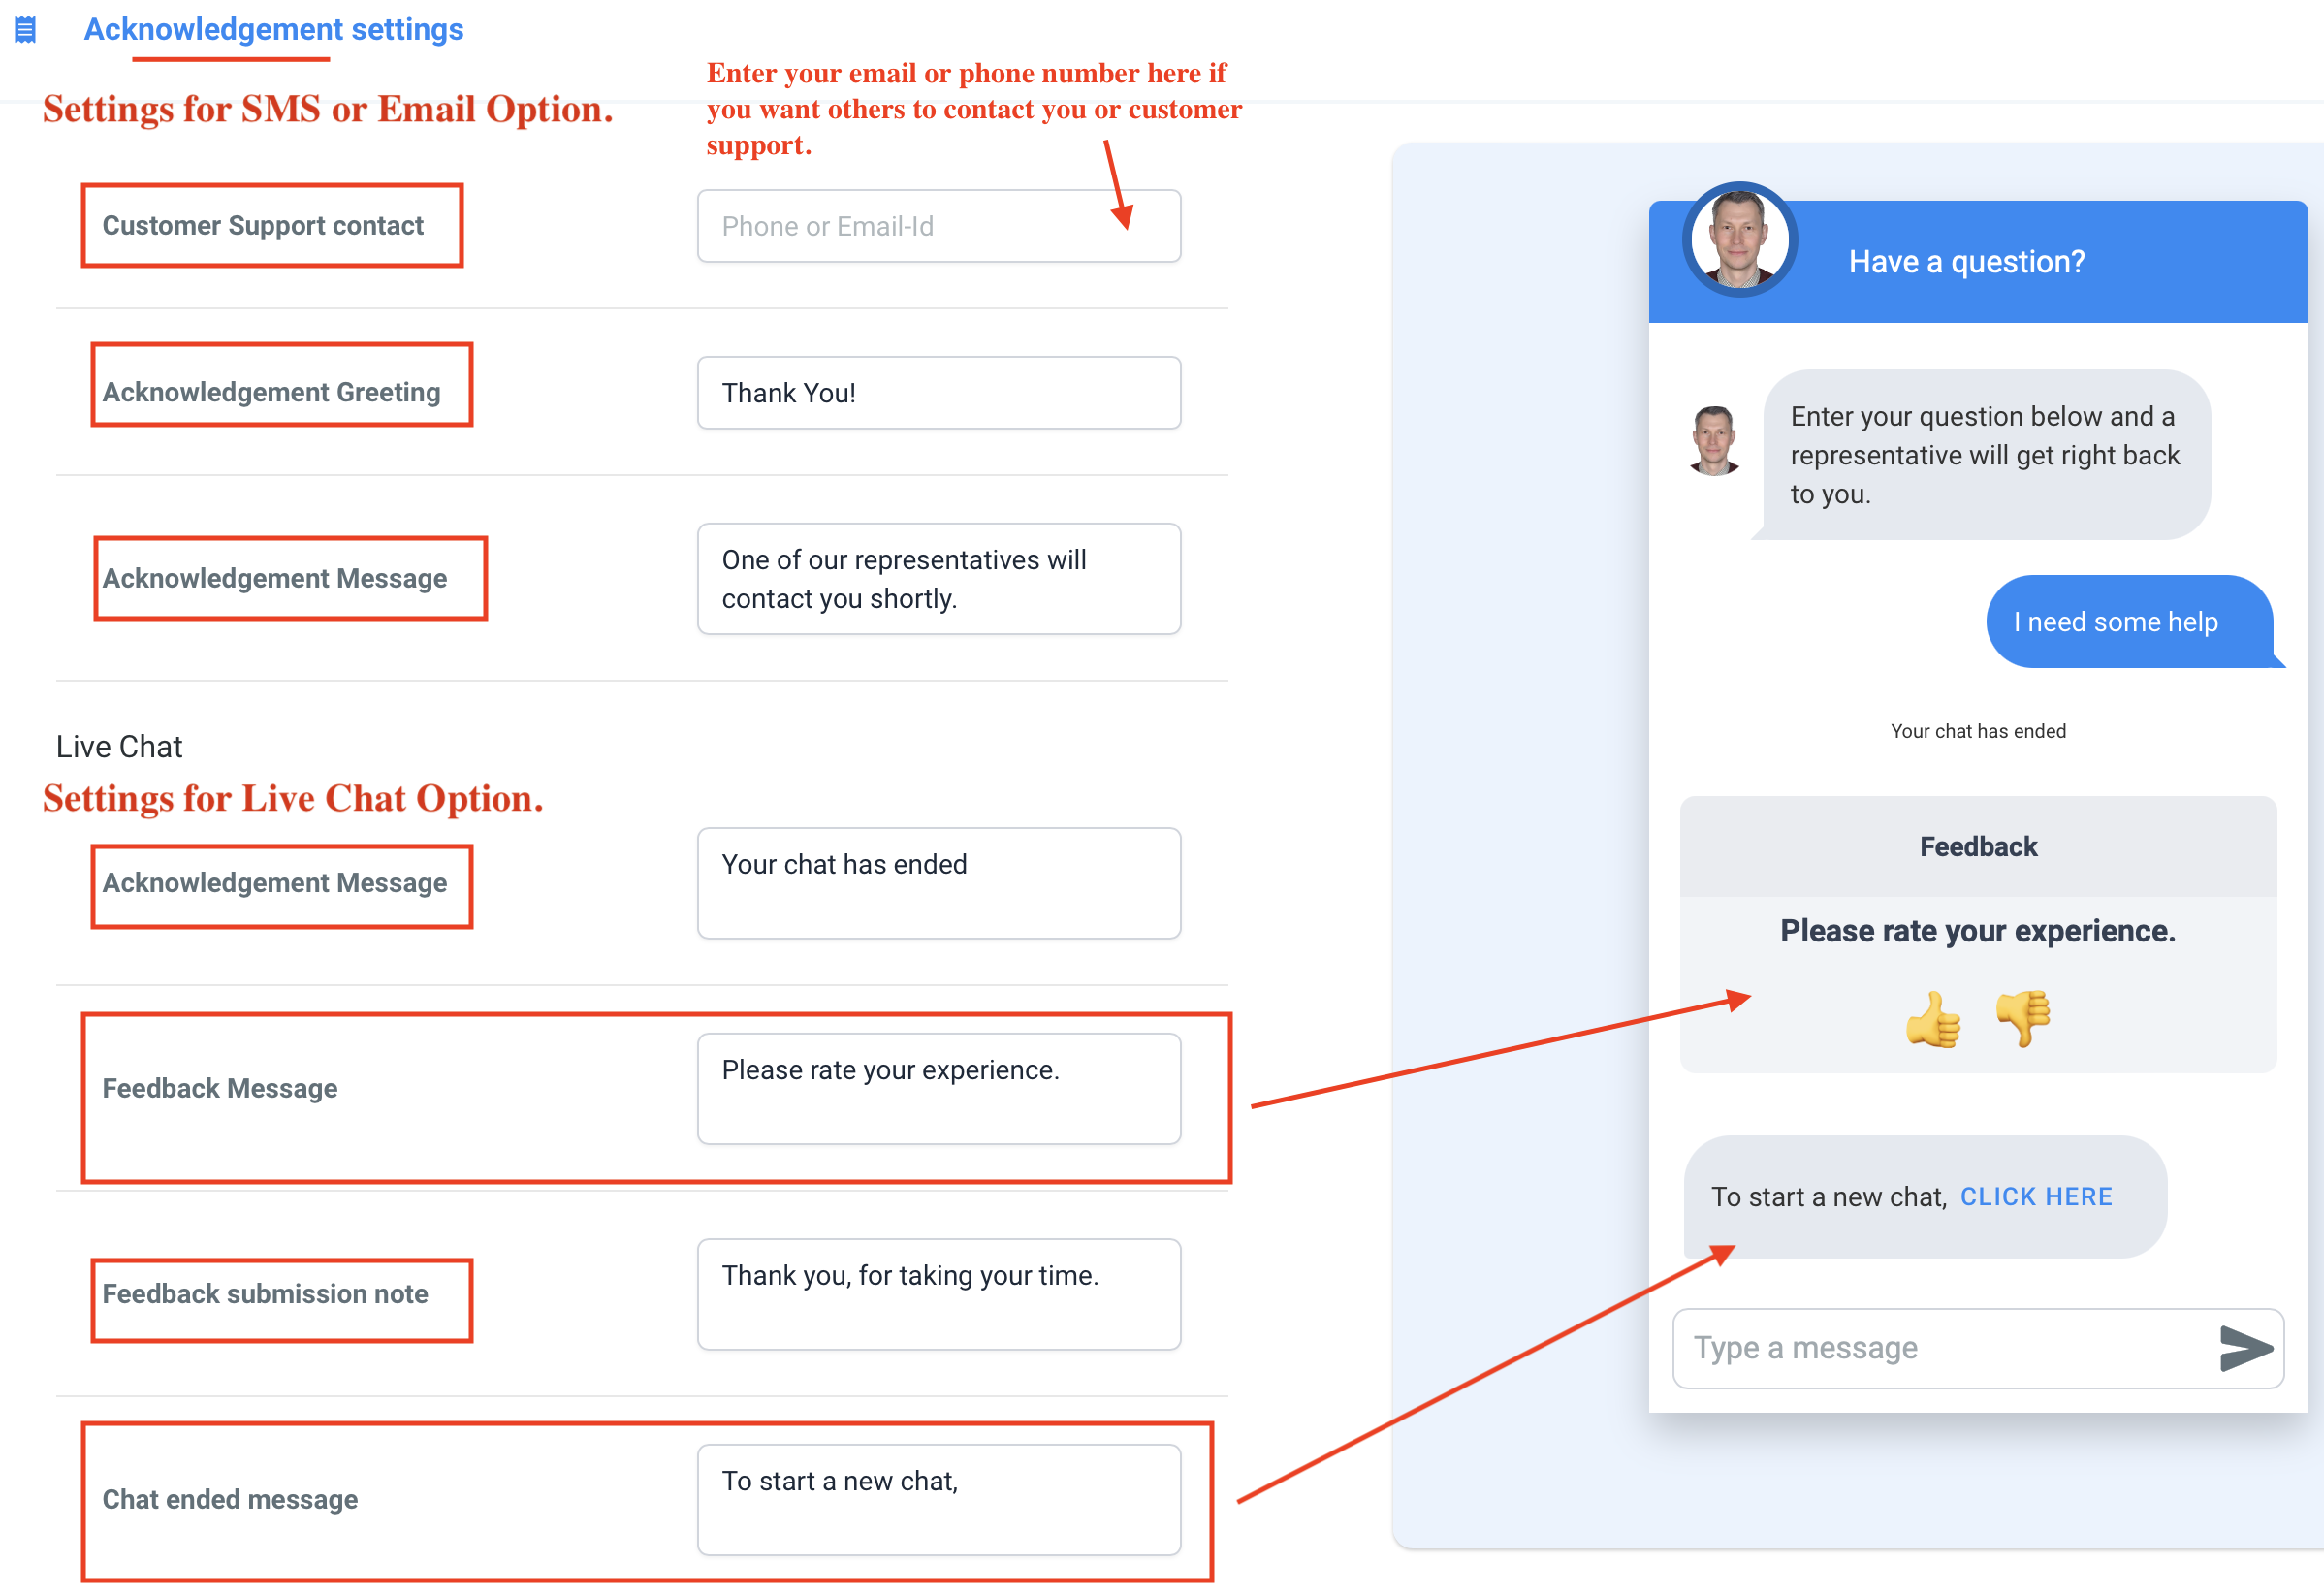
Settings for SMS or Email Option.
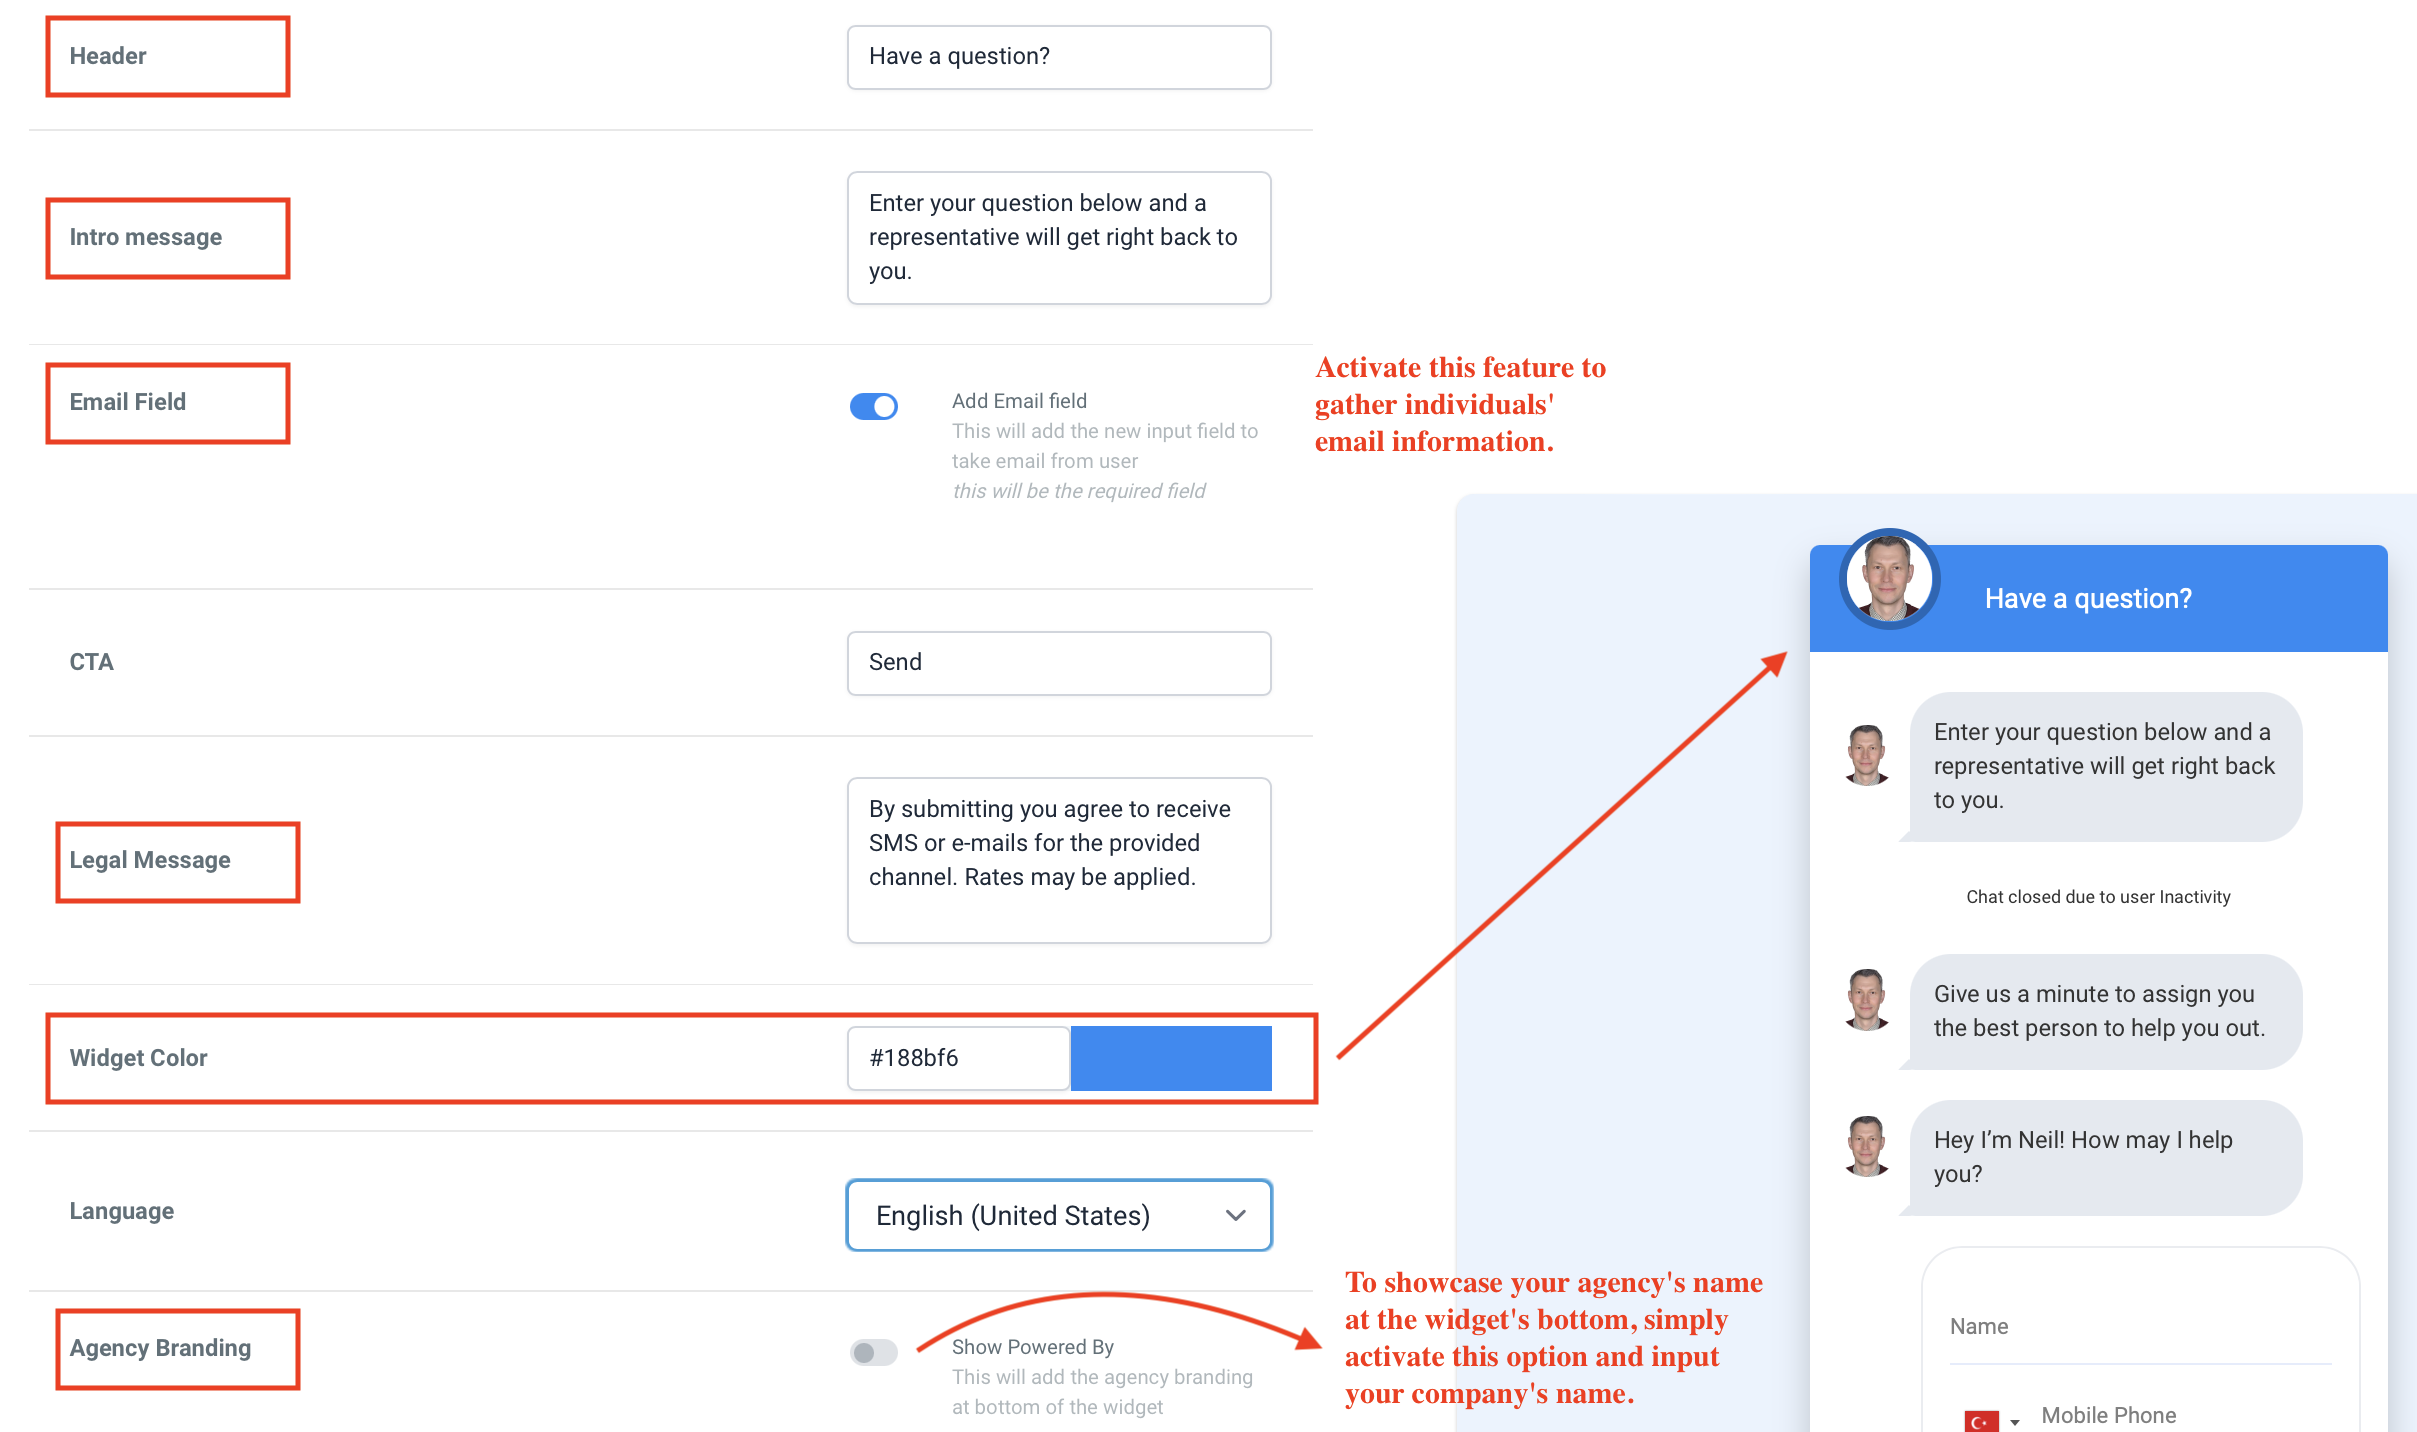
Settings for Live Chat Option.
In the live chat settings, you have the flexibility to personalize the message that clients will see after submitting their initial message. Additionally, you can define specific actions for scenarios where a response might take longer than five minutes.
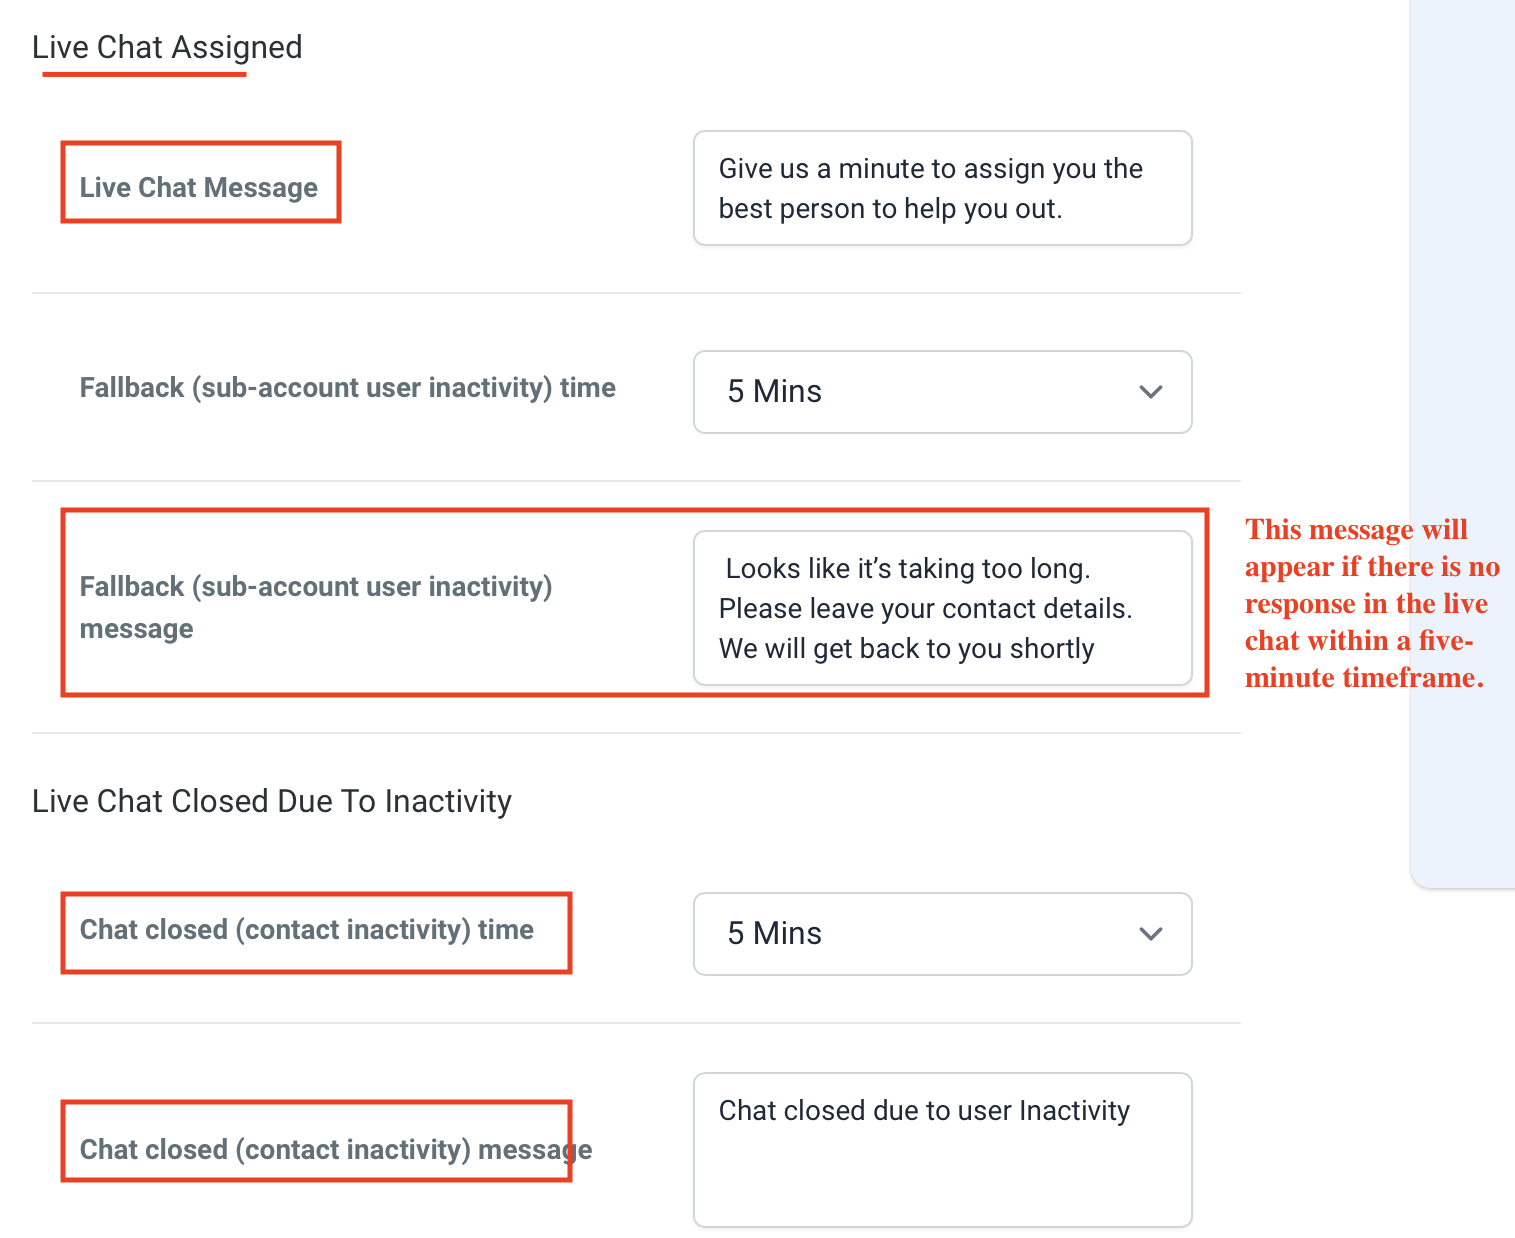
Define the acknowledgment message in Acknowledgment Settings and save your preferences. The acknowledgment message is the response that clients will see once their request has been submitted or when the conversation concludes.
After configuring, copy the code for your web chat widget:
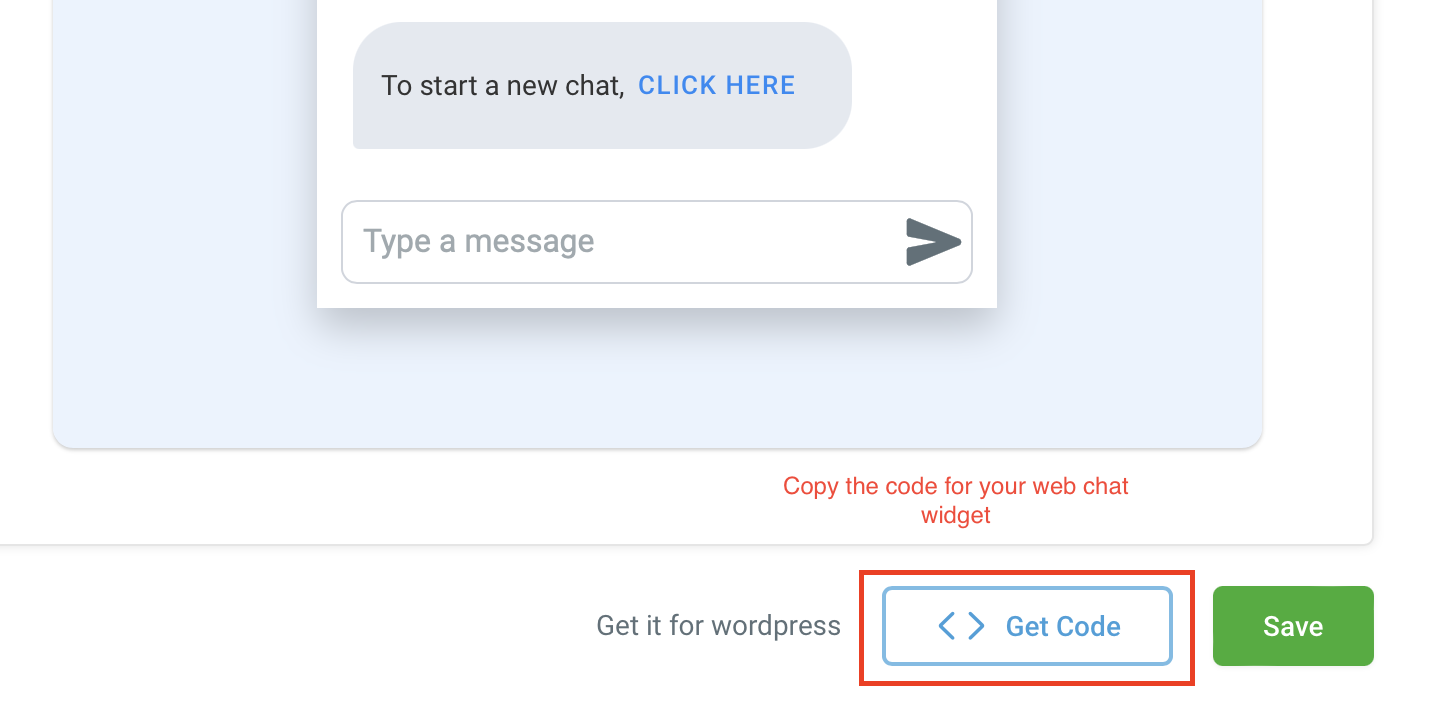

IMPORTANT: If you've opted for SMS or email chat as the chat type, the code displayed at the end corresponds to that specific selection. If you want to switch to live chat, save settings, copy the new code, and replace the old one. Failure to do so will result in the changes not reflecting on the homepage.
How to Customize the Chat Widget on Your Website's Front Page
Go to 'Sites,' select your website, and embed the code. To do that we can do the following:

Click “Edit” > Add a new element at the bottom of the Page > Choose “Code” To make sure the chat widget appears on every page of your website, just add the code to a section that shows up everywhere, like the footer. This element is a consistent feature across all pages, easily identifiable by its distinctive purple color. This makes it easy for visitors to access the chat from any page. See the example below.

If you want the chat widget on a certain page, just add the code to any green-marked element, then follow the instructions below.

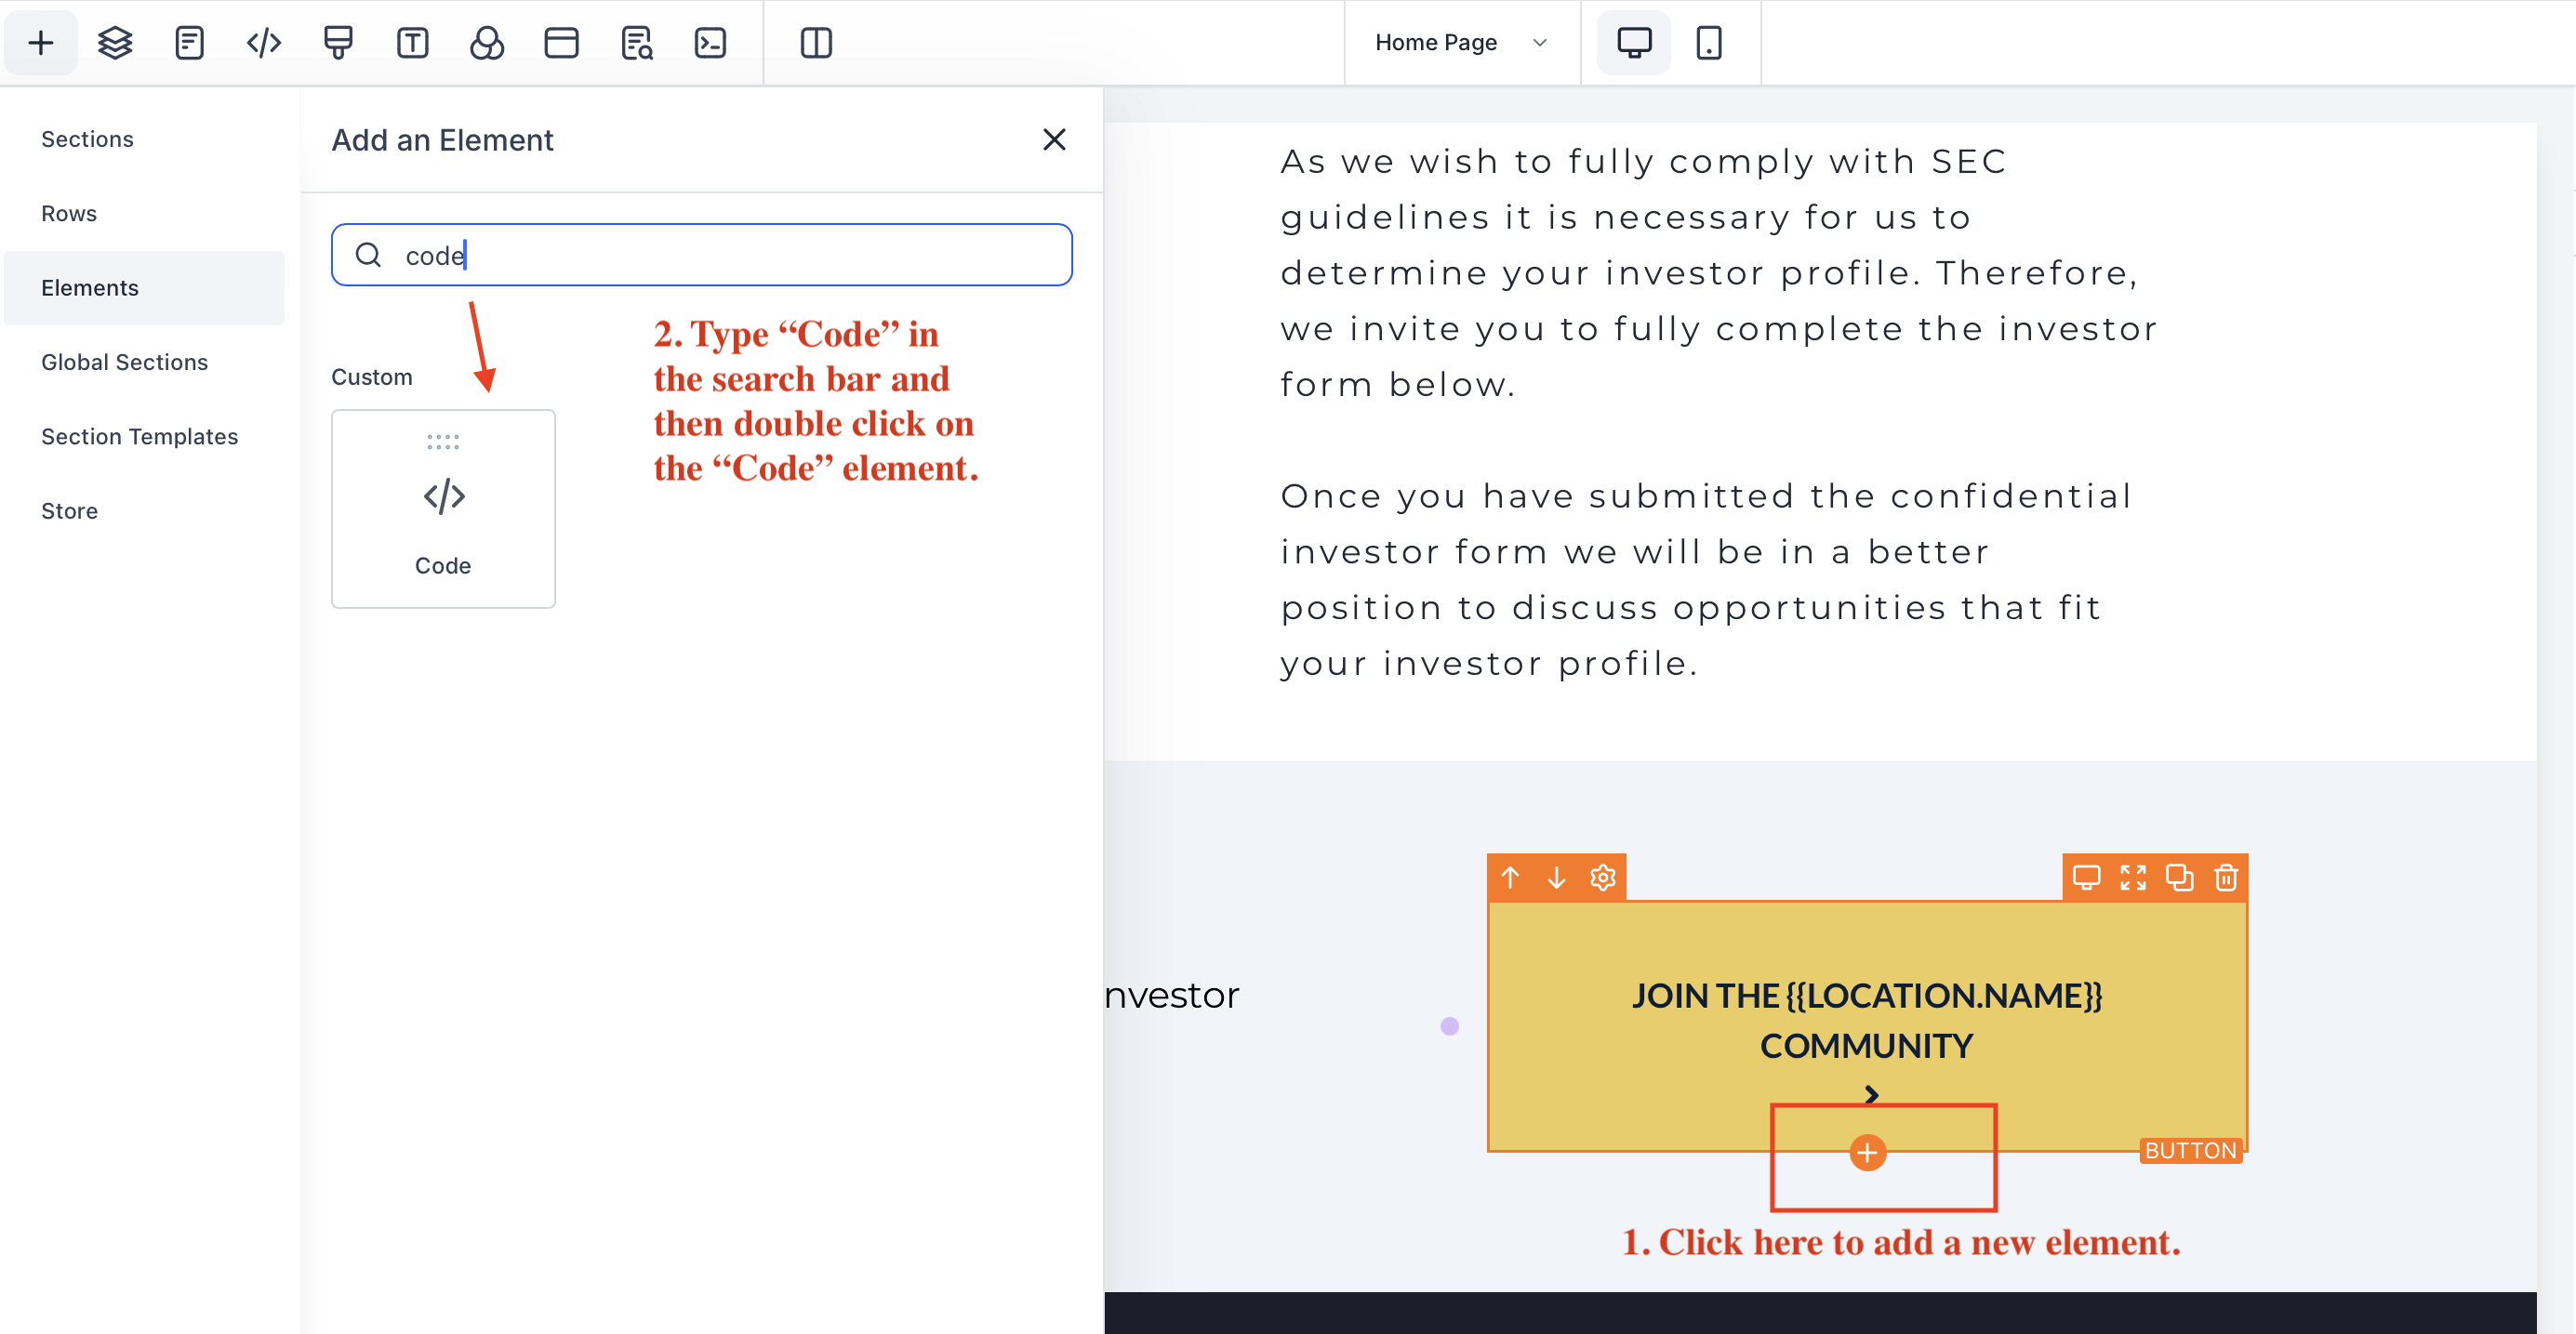
Click on “Open Code Editor”
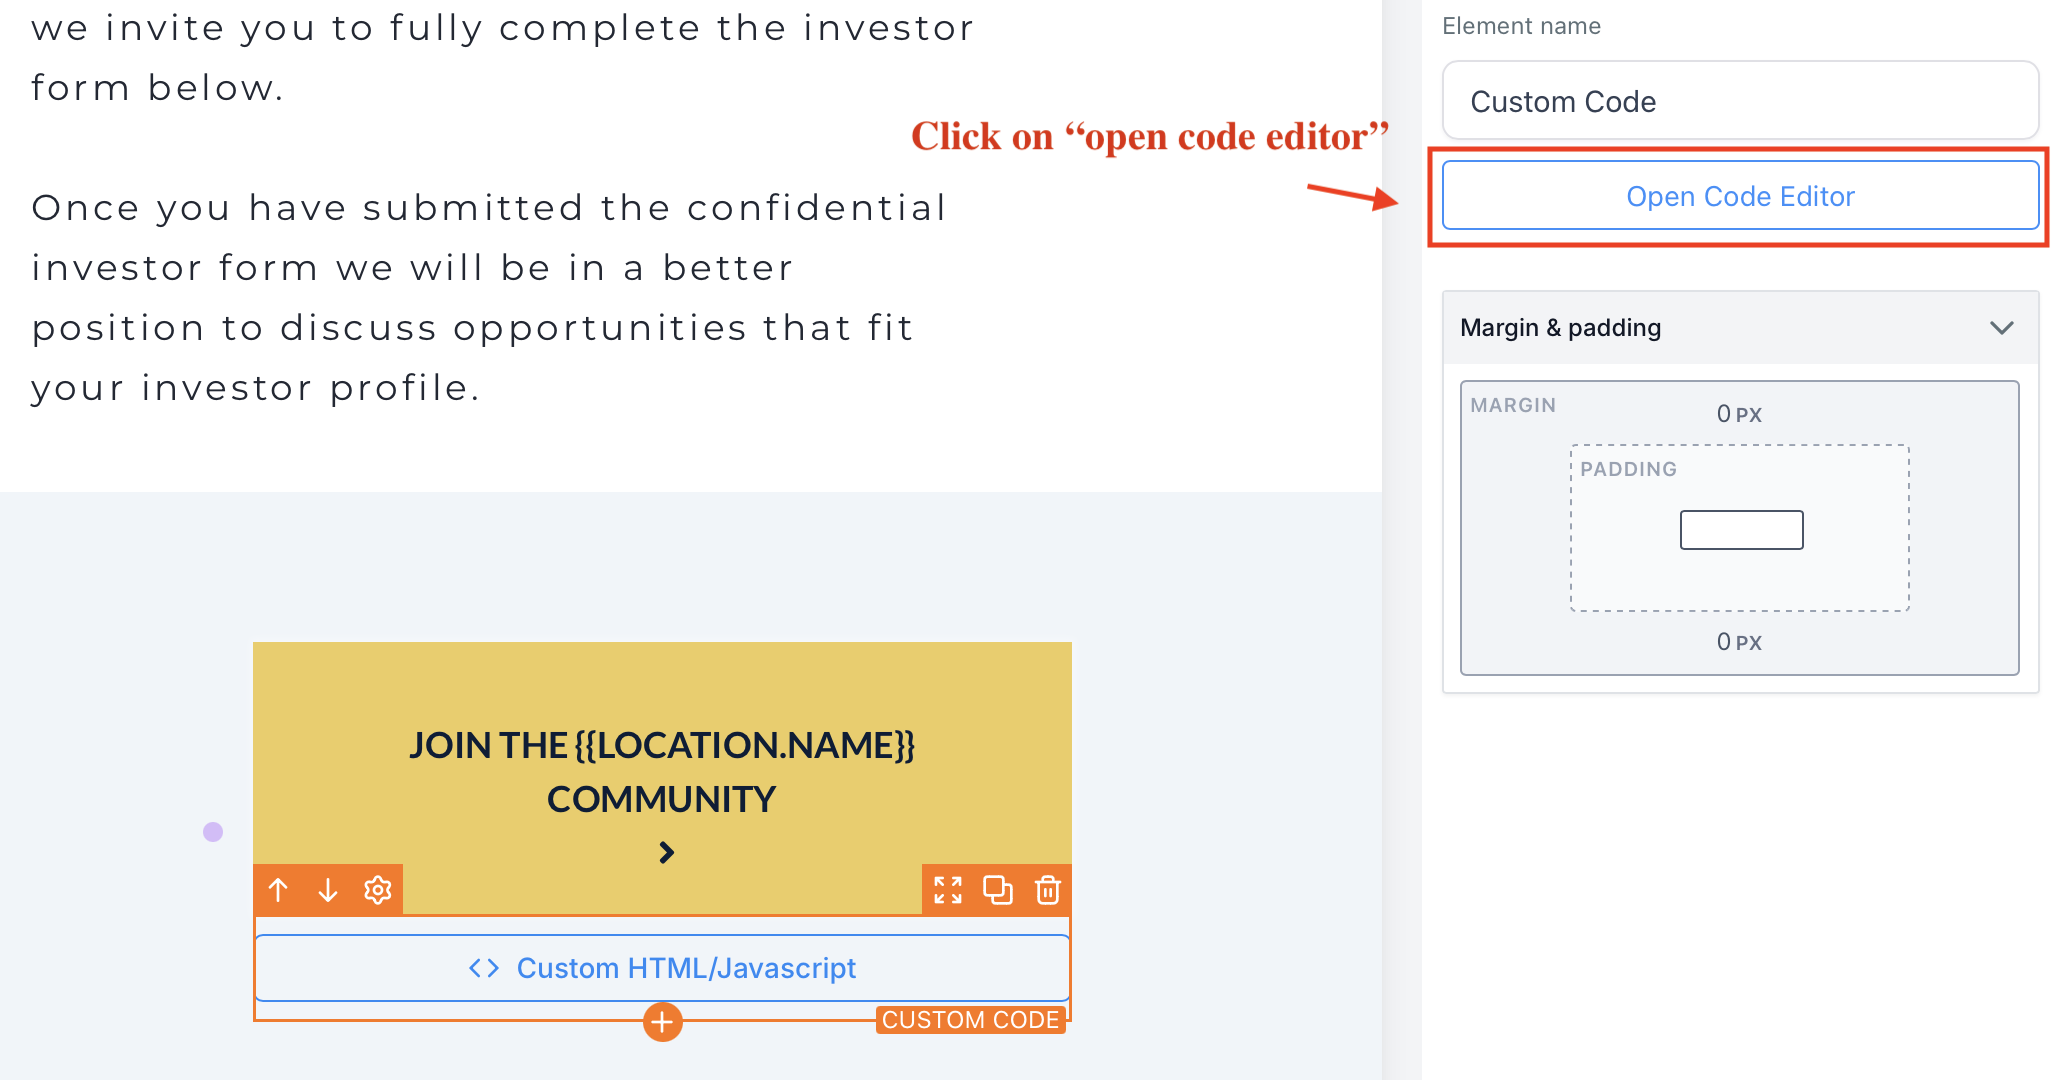
Paste the code.

Save changes and preview your updated website.
Now, visitors can use the web chat widget to submit messages, and you can respond via SMS or email, improving customer engagement and support.

Messages sent through the chat widget will show up in your “Conversations”. From there, you can choose how you want to reply.
In another tutorial, we'll learn how to test out your chat widget to see it from the contact's perspective.
Have a question?
Send us an email at [email protected]
or click here to see more options to contact us

