
How to create, edit and organize Custom Fields
In this tutorial you will learn how to create new custom fields, edit existing ones and organize your folders of custom fields.
First, what are Custom Fields, Groups and Objects?
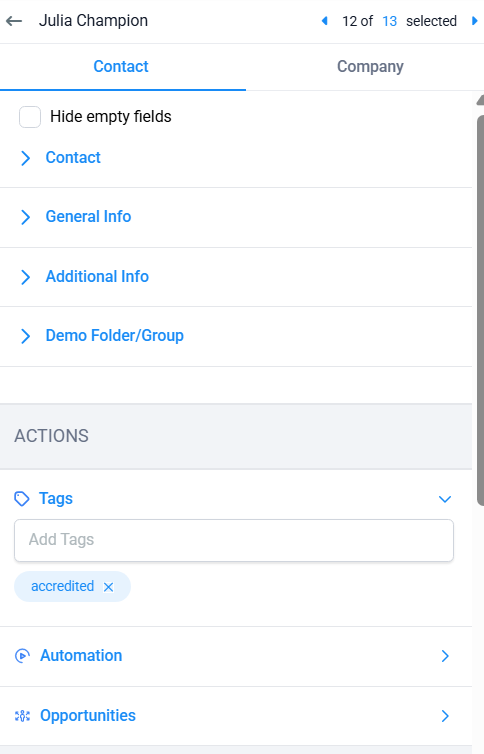
Custom fields are the sections in your contacts and opportunity cards in the pipeline feature where you put important information for your prospects and investors (learn more about pipelines here). (e.g. Address, Phone, Contact Source etc.) You are able to edit both the fields themselves and the order they show up in.
A Group is a folder in your Objects.
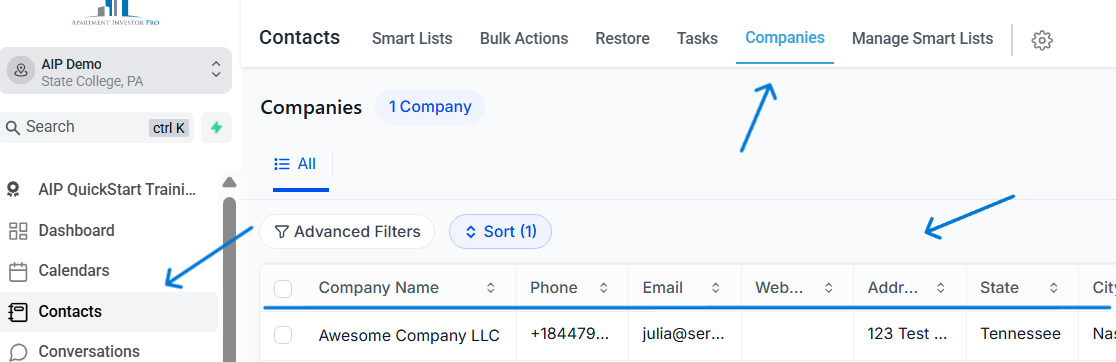
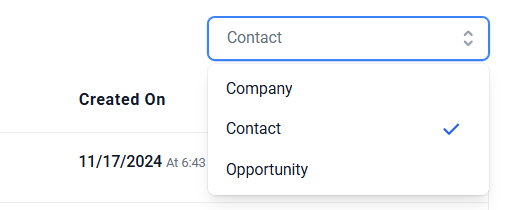
Objects is the name of the section of your settings where you can view your custom field folders (groups) and where they will show up. Objects are divided into 3 sections depending on where the custom field/folder will show up: in a regular contact, in a pipeline opportunity card, or in a company’s details (see below for more info).
If you select the Contact object, the folder will appear in the contact details of your Contacts section.
If you select Company object, the folder will appear in the company details in the Companies feature.
If you select the Opportunities object, the folder will appear on the opportunity cards in your Opportunities feature.

Now that we know what custom fields are and where they will appear, here’s how to create new custom fields, edit existing ones, and organize your folders (groups).
How to add new custom fields:
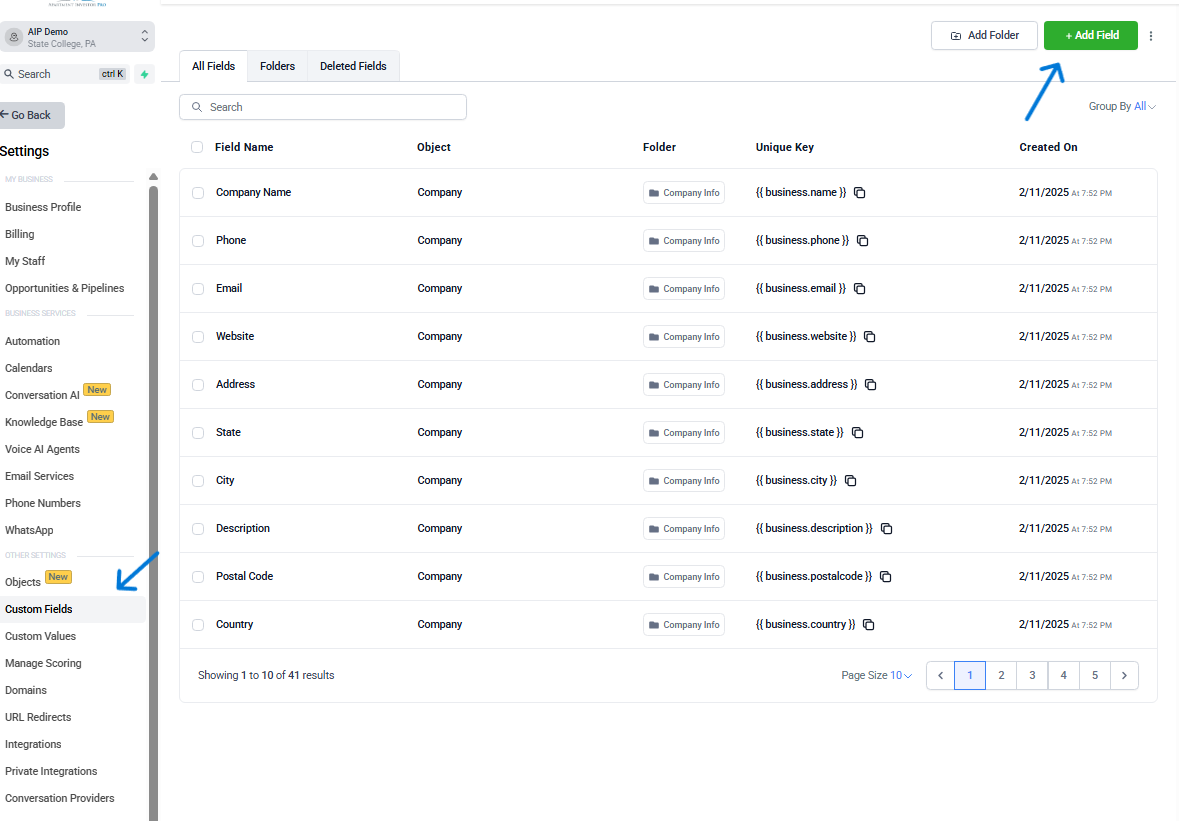
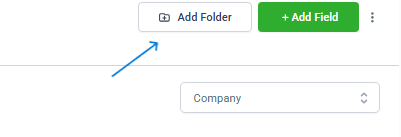
Go to your Settings > scroll down to Custom Fields. You will see all the existing fields. To create a new custom field, select the green “+Add Field” button.
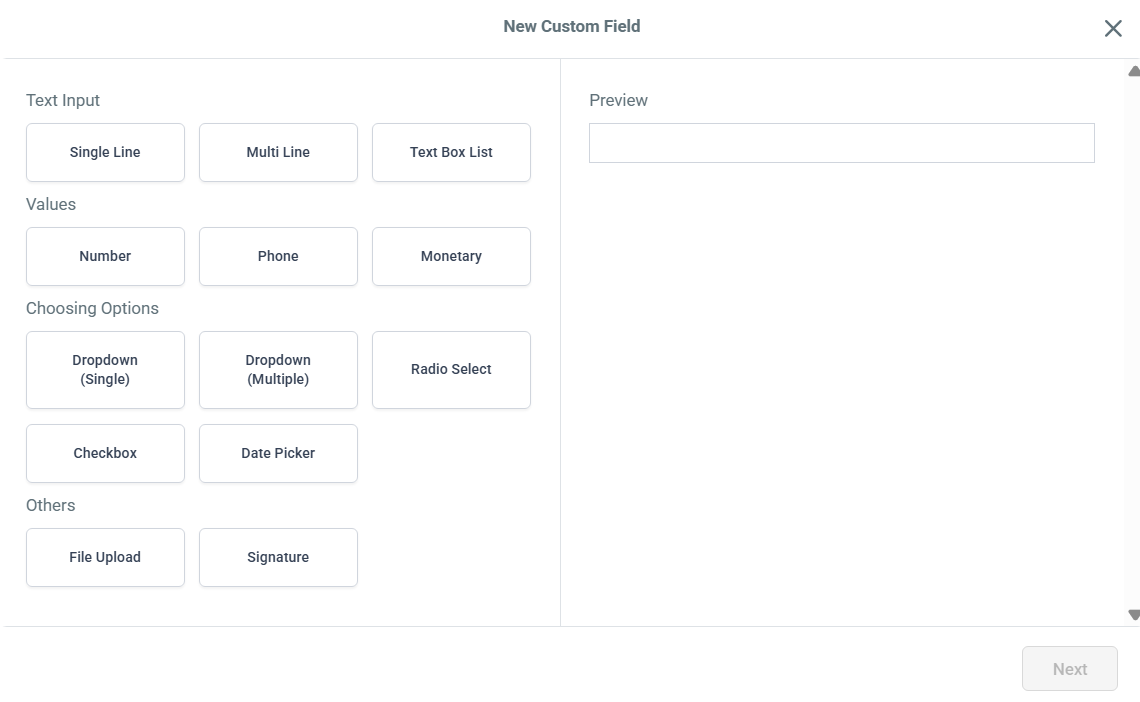
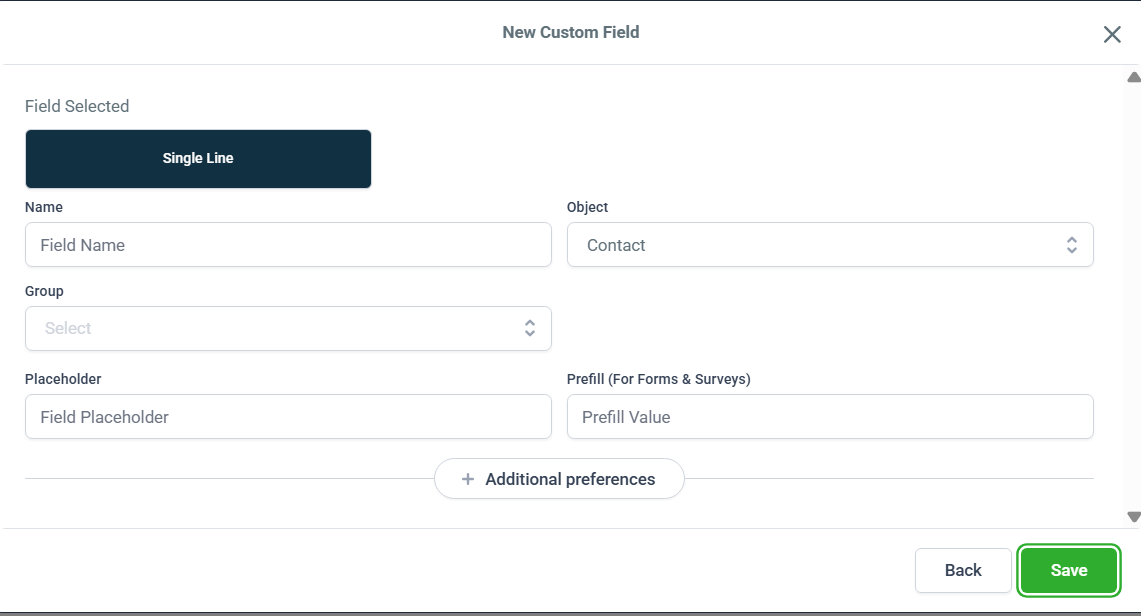
Then select the field you want to create. You can choose single line for text, monetary or file upload for example.
Then add a name, the object, the group, placeholder info (optional), and prefill value (optional). Then select “Save”.
How to edit existing custom fields
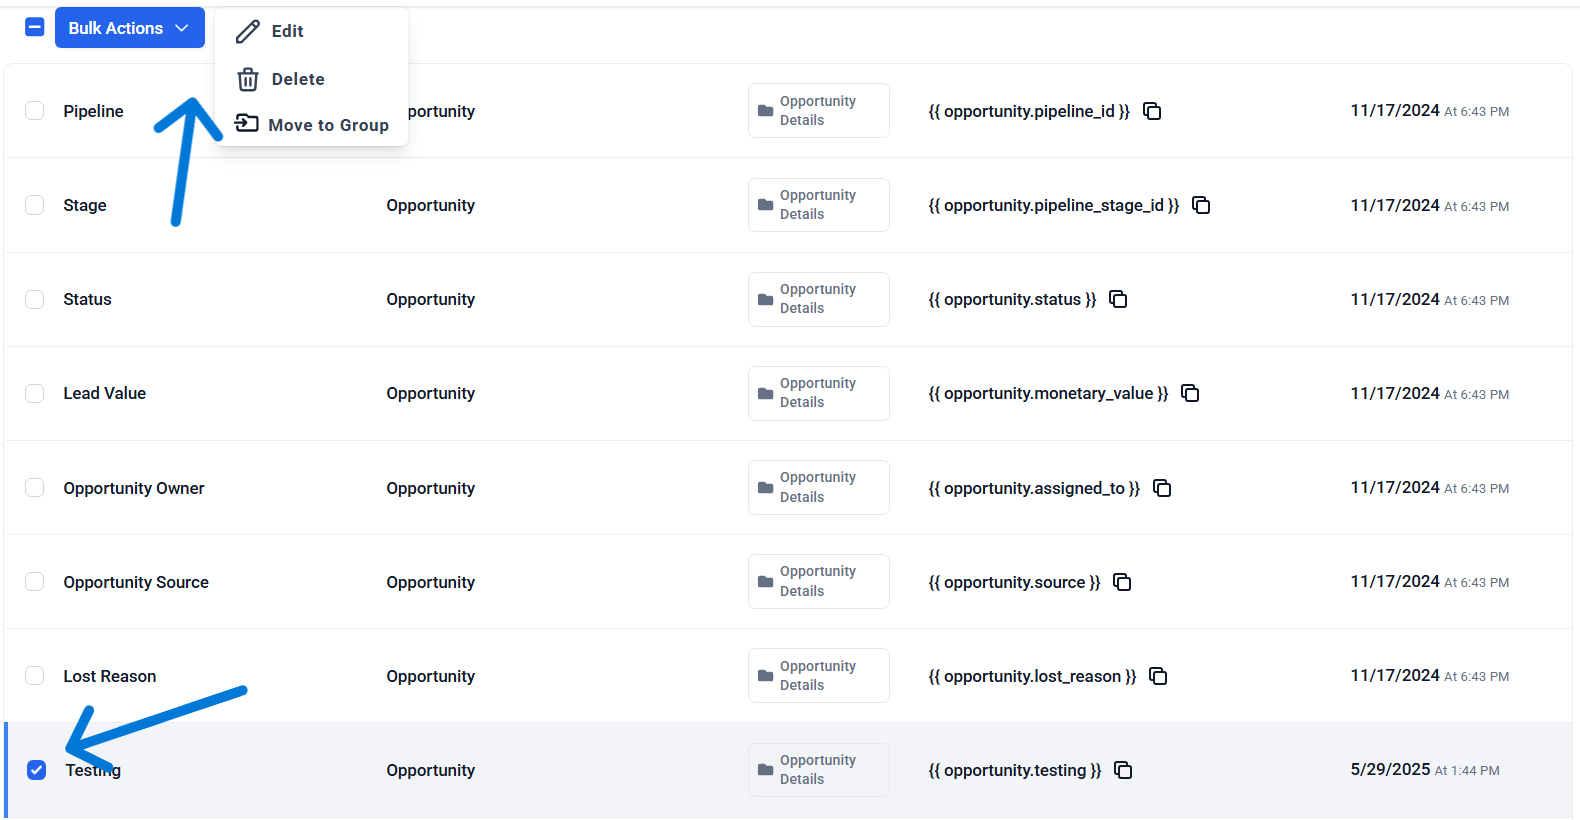
Option 1: Go to your Settings > scroll down to Custom Fields. You will see all the existing fields. Select the custom field you want to edit > select the blue Bulk Action button > then you can either move, edit or delete that field.
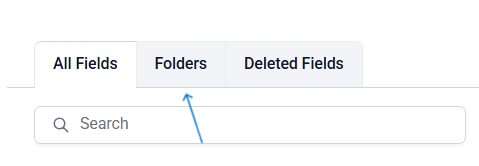
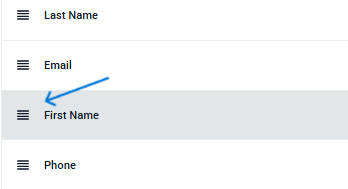
Option 2: Go to your Settings > scroll down to Custom Fields. Select the folders button at the top > click on the folder you want to edit > then select the three dots on the left side of the custom field you want to edit. You can also change the positioning of what custom field will appear above another by clicking on the three lines on the left side of the custom field and dragging it up or down.
How to organize your custom field folders
Go to your Settings > scroll down to Custom Fields.
To add a new folder, select the “Add Folder” button on the top right. Then you can name your folder and add it to an object.
To edit existing folders, select the folders button on the top, then select which object you want to edit the folders of, then you can click on the three dots to rename or delete a custom field.

You can also click the three lines on the left side of any folder and drag it up or down to change the positioning of which folder will appear first in the object it is in.

Have a question?
Send us an email at [email protected]
or click here to see more options to contact us