
How to Edit Text, Images, Sections, and Pages on Your Website
Log into your account using this link.
Down the menu on the left-hand side, click on Sites. Then, on the menu across the top, click on Websites.
Click on the site you want to edit.
Click the blue Edit button on the page you would like to edit.
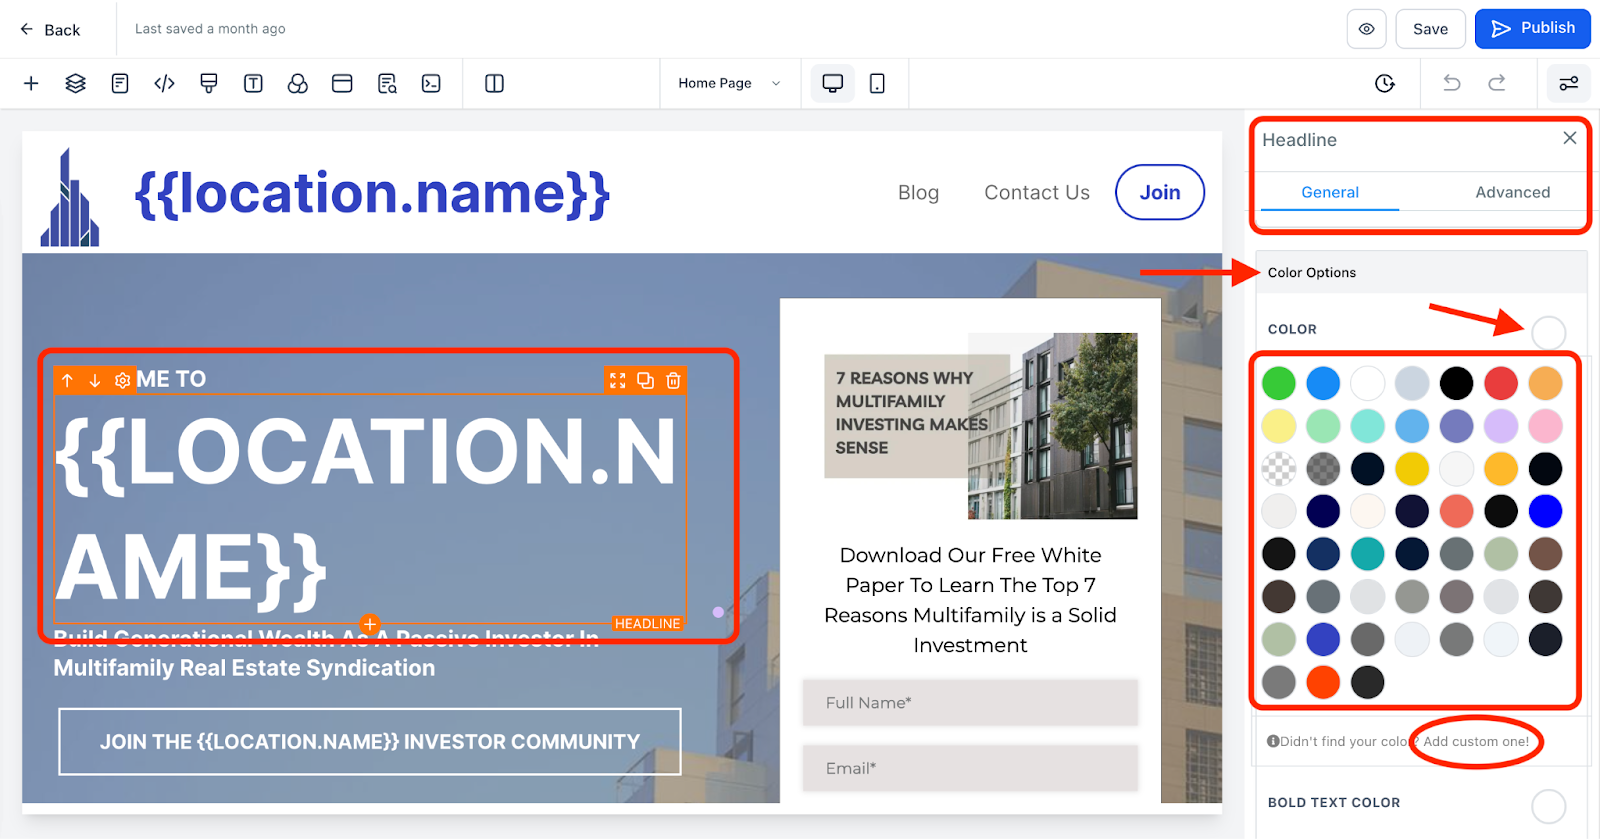
The page is divided into 4 parts: Sections (outlined in green), rows (outlined in blue), which are divided into columns (outlined in purple) and elements (outlined in orange). (NOTE: You’ll see the text {{location.name}} throughout the site. This is what the program uses to automatically fill in your business name throughout your site. You’ll only see that text in edit mode, but if you click in the little eye button next to Save, you’ll see the site filled in properly with your business name.)
Click on the section/row/column/element you would like to edit.
The settings will come up on the right-hand side. From there you can edit just about anything you can think of: size, color, font, etc. For example, to change the font color, find the section in the settings called Color Options. Then click on the circle next to Color, which will bring up different color options for the text you want to edit. You can even add a custom color if you’d like.
For an image, follow the steps above. Once you have the image settings open, find where it says Image Options. Adjust the size of the image using the Height and Width fields. To change or add an image, click on the button with a picture on it. Click on Upload from media library. Then you can add to your media library by clicking the blue Upload file button in the top right corner.

To add/change a background image, click on the area you want to edit. In the settings, find the section that says Background Color and then BG Media. You can use that field to add or change the background image. (Or add a video using the BG Media Type options.)
For any text, you can edit the content by clicking anywhere and typing as normal.
To add a section/row/column/element, click on the circle with the white plus on it. Then further options of what you can add will pop up.
Global sections: Any section that is outlined in a grayish purple color is called a global section, which means that any changes made to that section will take effect on any and all pages that use that section. (E.G., a header section, a footer section, etc.) To make a section global, simply hover over the section, and click on the save button on the left-hand side of the outline. Then give the section a distinguishing name, and add it to Global Sections. To view global sections already created, click on the + button along the top of the page. From the menu that appears, click on Global Sections. Then, click and drag the section you want to use onto the page.

Make sure to save any and all changes before leaving the page.

Have a question?
Send us an email at [email protected]
or click here to see more options to contact us